Probiotic Ranch Dressing Recipe with Food Bloggers Against Hunger

food bloggers against hungerHave you ever been hungry? Really hungry like the 16.2 million kids in America who are food-insecure living in families without the means to regularly put nutritious food on the table?

I'm hangry when I forget to eat a big breakfast before becoming immersed in a project and suddenly it's two pm and I want to eat RIGHT NOW. I was hangry yesterday, in fact. I was surrounded by healthy food; I only had to stop a moment to prepare and eat it and my belly would be full. I thankfully have never been truly hungry.

But 48.8 million Americans struggled with hunger at some time during the year 2010. 1 in 4 Americans used at least one of the 15 USDA food and nutrition assistance programs. While many local food advocates like me disagree with some of the food choices available in some USDA nutrition programs, there's no denying that any food, even factory-farmed food, is better than no food at all for those who are hungry.

A country as great as America is cannot stay this way when children and families are hungry. Children cannot learn in school, crime and domestic unrest increase, and our national productivity declines when people are unable to meet their most basic needs.

My family delivers food donations to our local food pantry. We plant extra rows in our garden and share our harvest. The farmers' markets I work at collect fresh seasonal food for donations. But this type of charity is clearly not enough to meet the need when food pantries are inundated with hungry families.

To truly eliminate hunger, governmental leaders must continue to address and fund anti-hunger and anti-poverty programs. Take 30 seconds now to send a letter to Congress lending your voice to the cause.

When you have a little more time, consider the new film A Place At The Table documenting the complex problem of hunger in America. Accompanied by the music of T Bone Burnett and The Civil Wars, the picture also promotes solutions. Find a viewing of the film in your city or on demand through iTunes and Amazon.

probiotic ranch dressing recipe

Today, April 8, food bloggers around the world are sharing recipes to address hunger. I am proud to contribute my recipe for probiotic ranch dressing to the Food Bloggers Against Hunger project.

One way my family saves money at the grocery and adds flexibility to our dining is by making our own salad dressings. A bottle of dressing is at least a few dollars at the store and often includes manufactured oils, sugars, and stabilizers that I would prefer not to feed my family. The ingredients to make simple, fresh dressings at home are cheaper and healthier.

We whisk together this buttermilk ranch dressing recipe frequently because it pairs well with fresh greens in season now and is useful as a dipping sauce too. It uses buttermilk and sour cream, both full of live active cultures that can aid digestion.

ranch dressing recipe

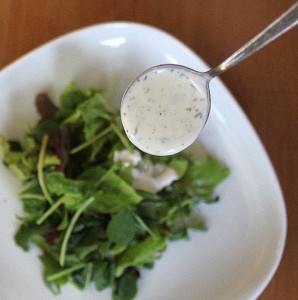
Probiotic Ranch Dressing Time: 2 minutes active, 30 minutes inactive  Makes: 1 cup

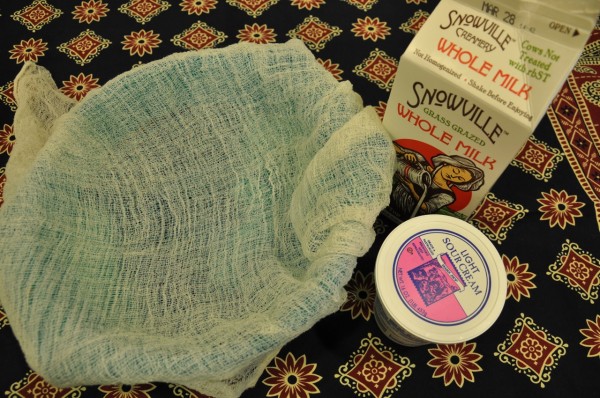
1/2 cup buttermilk with live active cultures 1/2 cup sour cream with live active cultures 1-2 teaspoons minced garlic chives (can be grown from a sprouting garlic clove planted in a pot of dirt or foraged from your backyard if you are lucky like us and they grow wild in your area) 2 teaspoons minced fresh parsley or 1/2 teaspoon dried parsley 1 teaspoon minced fresh oregano or 1/2 teaspoon dried oregano flakes 1/2 teaspoon finely ground black pepper salt to taste

1. Mix all ingredients. Adjust consistency to your liking by adding more sour cream for a thicker dressing or more buttermilk for thinner dressing. 2. Refrigerate for at least thirty minutes to allow flavors to combine. Taste and adjust seasonings as desired. 3. Serve within one week.

Food = Love Indian Paneer Cheese {Recipe Guest Post}

paneer cheese recipe

I am pleased to share an authentic Indian paneer cheese recipe today from Susan Saldanha. She is a Columbus cook originally hailing from India who teaches custom cooking classes about Indian culinary traditions for groups and individuals in your home. Contact Susan by email to experience her healthy, delicious take on Indian cooking. 

June 2012 was memorable because I went back home to India after eight long years. Landing in Mumbai India I was hit by the heat, the humidity, the flood of humanity and a hunger in your belly. I began to realize I missed all of this so much.

My mom grumbling to a visiting neighbor awakened me one sweltering afternoon. In muted tones she said "Mrs. Advani, please stop sending food. All the neighbors bring her food claiming it was her favorite dish when she was a girl and I don’t get a chance to cook for her. After all, she’s my daughter visiting after eight years."

In India, Food= Love and believe me I had a lot of good “love” growing up.

Today I will share with you a taste of my Motherland: a Paneer cheese recipe. This is often eaten in the US as Mattar Paneer (peas and paneer) or Palak Paneer (spinach and paneer). Paneer comes from Northern India. It is a fresh milk cheese that is easy to make. Highly nutritious, it is a great source of protein. Its subtle flavor profile allows it to absorb the Indian spices very nicely but can be eaten by itself as a delicious ‘anytime-snack.’ paneer cheese ingredients

How to Make Paneer

Ingredients

  • 4 cups of whole milk

  • 3/4cup sour cream or yogurt (sour cream adds a decadent lusciousness to the paneer)

  • Cheesecloth folded over to give you four layers

  • Colander

  • Heavy bottomed pan

paneer cheese curd pressing paneer cheese Method:

  1. Bring the milk to a boil on a medium flame in the heavy bottomed pan. Keep the flame on medium as milk burns very easily and will add a burnt taste to your paneer.
  2. Add the sour cream and keep stirring gently. Turn the heat up to high to facilitate the curdling process.
  3. The milk will begin to appear lumpy and will have light green whey around it.
  4. Strain the whey in a cheesecloth lined colander.
  5. While the paneer is still in the colander run cold water over the paneer till it cools down. Squeeze as much of the extra water out of the paneer as you can by twisting the lose ends of the cheesecloth.
  6. While still in the cheesecloth place the paneer under a weight (a heavy pan or a foil lined brick) on your counter for about 1-2 hours.
  7. Unwrap the paneer and cut it into cubes. It’s ready to eat.
  8. Paneer keeps in the refrigerator for up to 3 days. Freezing is possible and cutting it into cubes before you freeze it is a good idea. After thawing you have to lightly fry (preferably in homemade ghee) on both sides before you use it in cooking or else it tends to break apart.

Serving suggestions:

In my home we eat paneer fresh and love it with a slight drizzle of honey or on a toothpick with a small piece of pineapple and a sprinkle of chaat masala. (Chaat masala is a spice blend used on a variety of snacks and has spicy, salty, and sweet tones. It is available in any Indian grocery store.)

Note from Rachel: Our favorite Indian cooking book is 1,000 Indian Recipes by Neelam Batra.

Bison Jerky - A High Protein Snack {Recipe}

dried bison jerky recipe

Jerky. This unattractive but nutritionally dense snack is something my family often neglects for months at a time. Then we'll remember and binge on homemade meat treats again.

Jerky appeals to the current paleo, low-carb, and low-fat diets. It's also free of most allergens and simple to make without extra equipment; we made it for many years in the oven before adopting the neglected dehydrator living in my parents' basement. Like many good things, jerky takes some time but not much active interaction. You simply cut the meat, marinate overnight, and dry the next day.

Lower fat meats work best for jerky. Turkey jerky, made from a whole turkey breast, is one of our favorites. This time around we used bison from Ohio Bison Farm for a beefy flavor.

slicing bison for jerky bison sliced for jerky
Cutting the meat is the most skill-intensive step. The goal is evenly thin pieces that will dry in the same amount of time. Be patient and unafraid to use a meat tenderizer if necessary.

Whether you cut with or against the grain is up to you. Cutting with will result in a chewier product, against is more tender but may fall apart in a finely grained cut of meat.

jerky marinade bison in marinade
The marinade does contribute to preservation but is not critical. You can make totally unseasoned jerky if you wish. We find that a balance of acid from vinegar or lemon juice, salt, a small bit of oil, and spices makes the best flavor. The two recipes below are ones we honed after a decade of experimentation. Feel free to tweak them to your tastes or ingredient availability.

bison jerky dehydrating

Dehydration provides the preservative effect. The USDA recommends starting the drying process by heating the meat to 160 degrees F and then dehydrating at 140 degrees or the lowest temperature your oven will allow. Our dehydrator has a maximum temperature of 145 degrees F which is what we've always used.

Store jerky in a glass jar or other air-tight container in a cool dry place like a kitchen cupboard for up to two months. You may also freeze jerky.

The whole family will be at the Clintonville Farmers' Market this Saturday, January 26, from 10:30 - 12:30 drying and sampling jerky. Stop in to shop for local foods and talk to us!

homemade jerky in jars

Bison Jerky Makes about 30 large pieces to fill quart jar Time: 2 days, 30 minutes active

1 pound bison roast per marinade recipe below; our four layer dehydrator can fit 2 pounds

Teriyaki 1/3 cup soy sauce (use wheat-free for a gluten-free product) 3 tablespoons rice vinegar 2 teaspoons honey or granulated sugar 2 tablespoons water 10 grinds black pepper 1 teaspoon ground dried ginger 1 teaspoon garlic powder 1 teaspoon sesame oil 1 tablespoon olive oil dash Sriracha (optional)

OR

Down East 2 teaspoons Old Bay seasoning 1 tablespoon honey 1 tablespoon lemon juice 1 teaspoon salt 1/2 teaspoon garlic powder 1 tablespoon olive oil 1/2 teaspoon paprika 1/2 teaspoon chili powder

1. Slice bison roast into very thin (1/8 inch) pieces. Pound uneven pieces thin with a meat tenderizer. 2. Mix all ingredients for one of the marinades and place in non-reactive glass or plastic pan. 3. Add jerky to pan, mix and cover. Marinate in refrigerator 24 hours. Stir once during this resting period. 4. Place meat in a single layer in a dehydrator or on cooling racks settled on cookie sheets. Dry at 145 degrees F or in a very low oven (as low as yours goes, or 200 degrees F with the door ajar) for 5-8 hours or until jerky is dry throughout and yields no moisture when broken in two. 5. Allow to cool. Store in an airtight container for up to two months.

Chewy, Soft, Honey-Sweetened Butter Caramels With NO Corn Syrup

homemade honey caramelsMaybe you are snowed in with a little extra cream from holiday baking. Or you want to master the art of candy making. Perhaps you want to impress someone with the most delightful sweet bite at the end of a meal. Maybe you have some fantastic honey to highlight. I adapted this recipe because I had excess expiring Snowville cream I couldn't let go to waste. Caramels sounded good but I could find precious few recipes without corn syrup. I'm not rabidly against corn syrup but I don't choose to keep it around the house. I also wanted to practice candy-making. I am inconsistent because I typically become distracted with another chore or are trying to manage too many things in the kitchen at one time.

caramel ingredientscandy thermometerboiling caramel

I started by making butter by hand to use up more of the cream. I waited patiently while sugar and butter roiled on the stove until the exact right temperature. I even remembered to let the hot sugar cool before tasting - no burnt tongue!

The results were worth the effort. These caramels are soft and chewy but not pull-your-fillings-out sticky. They smell floral from the honey and surround the taste buds with richness. Whatever your reason, you will not be sorry after you spend an evening cooking caramels.

homemade caramel recipe

Soft Caramels adapted from Chez Pim Makes: 40-50 1 1/2 inch squares Time: 30-50 minutes

1  1/2 cups granulated cane sugar 1/2 cup honey 1 cup heavy cream 1/2 cup sweet cream butter (make by shaking approximately 2 cups room-temperature cream in a quart jar and skimming butter from buttermilk or use unsalted butter) 1 generous pinch salt 1/4 cup finely chopped chocolate (optional) parchment paper

1. Mix sugar and honey in a heavy-bottomed pot. Heat over medium until the mixture is melting, swirling the pan to stir without using a utensil. Continue to cook until the sugars have caramelized to a deep brown.

2. Meanwhile, in another heavy-bottomed pot, slowly heat cream to a simmer.

3. Whisk butter in small pieces into the sugar and honey. When it is totally incorporated, whisk in the cream and salt as well.

4. Cook over medium heat until the mixture measures 255F with a candy thermometer. Do not stir. This may take up to 15 minutes of boiling - be patient and keep cool water nearby in case you accidentally touch a splatter.

5. Meanwhile, line a cookie sheet or baking dish with parchment paper.

6. When the candy reaches 255F, pour onto the parchment-lined pan. If using chocolate, sprinkle over the top after 10 minutes of cooling.

7. Allow the caramel to cool completely. Cut with a serrated steak knife and wrap in parchment squares or layer between parchment paper in a covered container. Consume within 7 days for best texture.

Gingerbread: House for the Kids,Crisp Cookies for Adults {Recipe}

gingerbread crisp cookies recipeA few days ago, I shared some of our holiday crafts. I told you that my pastry-chef sister Heather baked gingerbread house pieces for Lil to decorate. Our kitchen remains sticky from the amount of frosting and candy used on that house. What I didn't reveal are the ridiculously good spoils from the house-making: Heather gave us all the trimmings from the gingerbread walls. Rough in shape, but generally slender, these perfectly crisp cookies beg to be dunked in coffee or tea. I eat a few pieces a day for a mildly sweet, spicy, crispy snack.

Sugar-coated house for kids and refined cookies for the adults - what a sweet holiday tradition!

gingerbread house recipe

Crisp Gingerbread
Yield: 1 # 12 oz (enough for a good-sized gingerbread house or approximately 4 dozen cookies)
4 oz (1 stick or 1/2 cup) unsalted butter
4 oz (~ 1/2 cup) brown sugar
6 fl oz ( 1/2 cup) molasses
1 whole egg
12 oz (~2 2/3 cup) all purpose flour
1 teaspon baking soda
½ teaspoon salt
2 teaspoon ground ginger
1 teaspoon ground cinnamon
½ teaspoon ground nutmeg
½ teaspoon ground cloves
parchment paper
    1. Cream butter and sugar until light and fluffy
    2. Add molasses and egg, beat to combine well
    3. Stir together remaining ingredients in a separate bowl
    4. Gradually add dry ingredients to wet, beating until just blended (Dough will be very wet.  If making for a gingerbread house, you may want to add extra flour to enable an easier roll out)
    5. Gather into a disk, wrap with plastic, and refrigerate at least 1 hour (for easier rolling, freeze dough and then roll out as soon as pulling from the freezer. It will still be a wet dough, but easier to roll out)
    6. Roll out to ¼ inch, using as much flour as necessary for easier rolling
    7. Cut with floured cutter, or bake for gingerbread house **see note
    8. Bake on a parchment-lined cookie sheet at 350 until lightly browned and feels barely firm when touched
**To get clean lines for gingerbread houses:
  •  First make a template out of cardboard or firm paper.  After freezing and rolling, bake before cutting out the pieces (this will work well if you roll the dough between pieces of parchment.  You can then just pick up the parchment paper, rather than trying to move the fragile dough).
  • Bake partially, until the gingerbread is golden, but still slightly soft to the tough.  Pull from the oven and let cool for 3-5 minutes, or until you can cut the dough without tearing it.  Place the template on top of the dough and deeply score the desired shape with a very sharp knife (I like using an exacto knife).
  • Let the dough cool entirely, then remove the excess gingerbread from the shape you cut out (wall, roof, etc.), you may have to cut the lines again, but it should be fairly easy to remove the excess gingerbread.
  • After removing any excess, return the shape to the oven to dry out one more time.  You will want the gingerbread to be very firm before taking out of the oven.
  • Let cool entirely and then assemble the house with a very thick royal icing (1 egg white whipped with enough powdered sugar to make a thick spread; add a splash of vinegar, or lemon juice, to help it to harden easier).  Decorate as desired.
The Pearl gingerbread house
PS. If you want to see some professional creations, I recommend the gingerbread house display at Easton Center on the second story of the mall near the AMC theater. Heather worked on The Pearl recreation with the Cameron Mitchell Catering group, pictured above.
PPS. I finally have a new laptop! After two months of scavenging time on shared computers, I have one of my own! It's taking a little time to set up all my preferences, but my first impressions of the Lenovo Twist are excellent.

Sassafras Bakery's Delectable Crumble Topping

sassafras bakery crumble topping recipe Lately I have been in a pie rut. My crusts have been tougher than I like and I suspected it had something to do with my switch to making pie crust with 100% butter fat. Compared to shortening, butter is arguably more healthy (because it contains healthy acids and vitamins) and easy to buy or make from local cream. I also much prefer the flavor of a butter crust to anything else. I could switch to lard and have made and used lard on occasion, but it isn't something I have on hand all the time.

I finally solved the butter crust riddle when I tested my theory that a thicker crust would correct butter fat's tendency toward toughness. The cranberry apple pie pictured above has a double crust recipe rolled thickly. The resulting crust is tender yet holds up to a fairly wet filling. It was neither mushy nor unyielding to a knife.

What placed my pie in the realm of perfection, however, is all in the topping. AJ of Sassafras Bakery generously shared her recipe with me on Twitter. Once I tested it, I asked for permission to publish for you and she agreed. Meet AJ and learn more secrets at her Buttercream-Decorated Sugar Cookies class December 1 and/or Art of Pie class December 8 at Franklin Park Conservatory.

crumble pie recipeapple cranberry pie

I made AJ's crumble with Hawaiian macadamia nuts and smothered it on top of cranberries and apples because those are the ingredients I had on hand. I know I'll try it with other nuts and fruits as the seasons turn - I can almost taste a pear pie with pecan crumble topping and peach with walnut. Play with this recipe and let me know what combinations you love! Sassafras Bakery's Delectable Crumble Topping Makes: Topping for 1 9-inch pie Time: 10 minutes preparation, 30-45 minutes cooking

2/3 cup raw nuts (macadamia, walnuts, pecans suggested) 1 stick (1/2 cup) unsalted butter 1/2 cup white granulated sugar 1 teaspoon ground ginger 1/2 teaspoon ground cinnamon 1/4 teaspoon salt 1 cup all-purpose flour

1. In a small saute pan, roast nuts over medium heat. Stir frequently and watch/smell carefully. As soon as nuts are slightly browned and smelling nutty, remove from heat. 2. Meanwhile, melt butter over low heat in a small sauce pan. 3. When butter is melted, add remaining ingredients and stir. Remove from heat. 4. Add nuts and stir to combine. 5. Spoon or use hands to place topping over a single-crust fruit-filled pie. You may not have complete coverage and that's ok. 6. Place a round of aluminium foil just smaller than the top of the pie on top to prevent burning. Remove foil five to ten minutes before cooking is complete to brown the top. 7. Allow to cool at least one hour before slicing.

Fast Flavor: Herb-Infused Oil

herb infused oil Often the simplest things can make the biggest differences in a recipe. A dash of cocoa powder in mole sauce or a clove of garlic in mashed potatoes elevate the dish from everyday to gourmet.

Such is the case with herb-infused oil.

Start with a high quality oil, such as extra virgin olive oil. Add a handful or two of fresh herbs and heat the oil gently for a few minutes. In that time, the herbs give over their flavor to the oil. Cool, strain out the herbs, and add a luxurious layer of flavor to salad dressing, sauces, or any recipe needing an herbal boost.

I used the pictured rosemary and sage oil to make a white bean dip. If I had used the herbs raw, the texture of the dip might have suffered, it would have turned an off-green color, and the pungent herbs could have overwhelmed the eater. Instead, the autumn-flavored oil heightened the spread from something mundane to a distinctive accompaniment to a crudite plate.

Fast flavor, short post. Try it!

New & Improved Baked Apple {Recipe}

My favorite season is here! I love autumn for chilly mornings, the rainbow of changing leaves, and my birthday. I also love apples, the quintessential fall fruit. baked apple recipe

Last night, Lil requested baked apples, a 'dessert' so nutritious that I had to indulge. The only apples we had on hand were the Freedom variety from Sippel Farm. These are tasty red apples but the skins are a little tough. I knew if I baked in my traditional way, the skins would become leathery but I had an inkling that a favorite kitchen gadget might help us out.

Apple Peeler Corer Slicer

Enter the apple peeler corer slicer. This gizmo is one I resisted purchasing for years because it has every marking of a unitasker. Indeed it only works well on apples, but it makes quick work of apples for crisp, jam, and sauce. We use it often enough to justify the $20 cost;  City Folk's Farm Shop has an apple peeler corer slicer to borrow.

apple peeler corer slicer

Lil loves to operate the peeler, as do her friends. Some of them ask for an 'apple slinky' every time they are over. Even the chickens appreciate this tool because they get to eat up all the skins and cores, so nicely cut into beak-sized pieces.

Baked Apple Recipe

Back to last night - Lil peeled, cored, and sliced our apples. I sat them upright in a baking dish and we filled with a little bit of butter, oats, nuts, and sugar. Lil sprinkled with cinnamon. Actually, Lil covered them in cinnamon as she was so enjoying making the spice rain down on the apples that she forgot to stop. Oops.

sprinkling cinnamon on baked apples

They baked in a low oven for an hour while we prepared and ate the rest of our dinner. I tipped the rounds into a spiral for service. Our dinner guests agreed that this was an improvement to the typical baked apple, as pleasing to the eye as to the fork.

baked apple spiral

Baked Apple Makes: 1 serving Time: 1 hour

1 starchy baking apple per person 1/2 teaspoon butter per person (can substitute coconut oil) 2 teaspoons sugar or honey 1 teaspoon rolled oats 1 teaspoon chopped walnuts or raisins (optional) 1/4 teaspoon cinnamon

1. Peel, core, and slice apples. Place with core hole vertical in an oven safe baking dish. 2. Fill core hole with butter, 1 teaspoon sugar, oats, and walnuts or raisins. 3. Sprinkle cinnamon and remaining sugar over the top of the apple. 4. Bake in 300 degree F oven for 40 minutes. Check for doneness by poking at apple. If it does not yield easily, pour 1/2 cup apple cider, hard apple cider, or water into pan and cover with aluminum foil. Bake an additional 20 minutes or until apples are cooked to your desired texture.