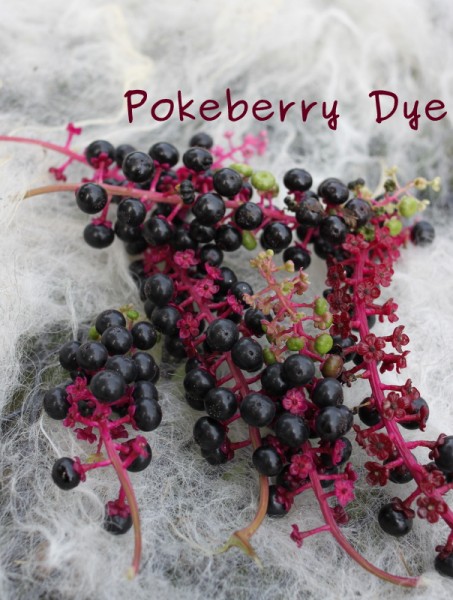
Harvesting Color from Weeds: Pokeberry Dye

dying wool with pokeberry When I wanted a natural dye for the Homestead Studio: Wool class, I turned to the library and discovered Harvesting Color by Rebecca Burgess. The book, arranged by seasons, is a field guide for making homemade dyes from plants with descriptions of plants, their native locations, and how to make them into dye. Each step is illustrated with clear, engaging photographs.

Autumn features a bright red wool dyed by pokeberry, also called pokeweed, pokeroot, and just plain poke. This weed litters our alleys, some plants reaching upwards of seven feet tall.

poke berry in alleypicking poke weed
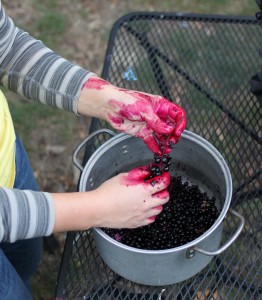
Alex, Lil and I collected several pounds of berries on a walk and juiced them by hand. Eating the berries or seeds may be toxic, but many herbalists believe they have antirheumatic properties. The juice stained our skin but washed away with a few soapy scrubs.

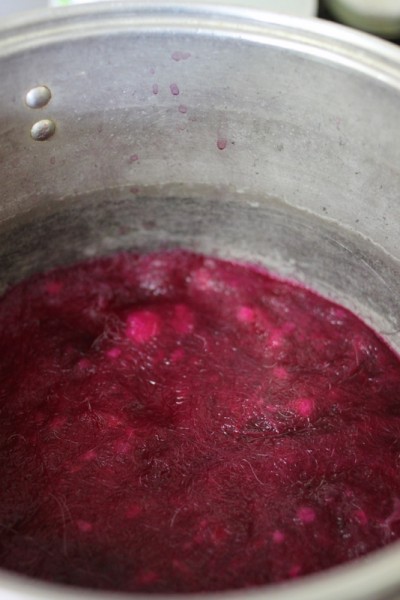
pulling berries off for dyecooking wool in pokeberry dye

I cooked the juice, skins, and seeds with some water and vinegar (1/2 cup per gallon) for an hour, being careful not to boil per the book's directions. Then I let the mix cool and steep overnight. I strained out the seeds and added washed, carded Navajo-Churro wool from Cota Farms. I cooked the wool in the same way as the dye. After it cooled and steeped, I rinsed the wool in several pots of fresh water. Throughout the process I was careful not to agitate the wool so it stayed fluffy instead of felted.

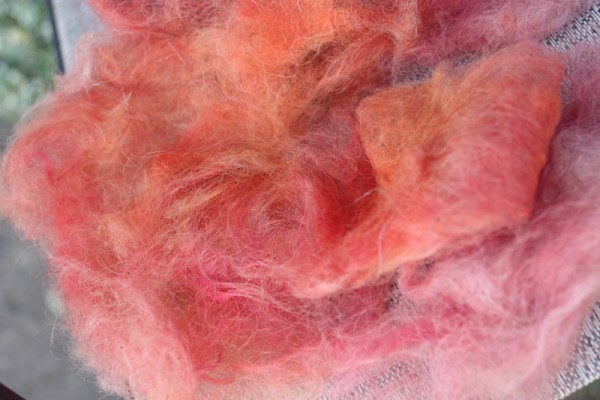
wool dyed with pokeberry

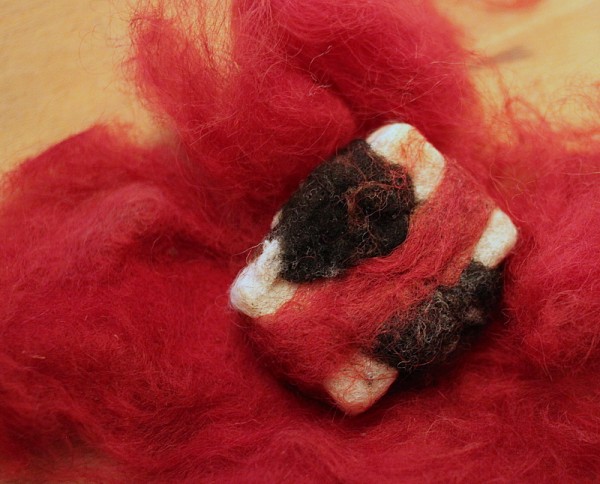
The resulting wool is the color of a sunrise with tangerine and pinks. I repeated the process for a second batch, one which ended up a more evenly dyed crimson red. We used some of the colored wool to felt soap at the Homestead Studio. You can see Lil's bar with natural white, natural black, and pokeberry-dyed crimson wool.

felted soap with pokeberry dyed wool

The pokeberry wool project represents so much of what I love about my crazy homesteading life. I took a local, seasonal item, played around with lots of time and some effort, and created something beautiful and useful. By taking an idea out of a book, I learned more than words could teach me.

This type of learning always leads to more questions. I wonder if the dye might work on cotton or silk. And why did one batch turn out so much more intensely colored than the other? Can I grow indigo and make blue dye next year? Maybe I will play with weeds again and find out.

Have you ever made natural dye?

Travelin' Hounds

Looking for a recipe today? I shared my mother's Tuna Noodle Casserole with the Columbus Dispatch for their article about potato chip toppings. snorkel in the living room

After a long draught of travel, this spring is shaping up to be a flood of trips. Check out our itinerary:

February 2 - Cleveland - Fresh Street Pop-up

February 10-11 - Cincinnati - Winter BeerFest and 5Bs Conference

February 18-19 - Granville - OEFFA Conference

end of February - San Salvador Island - Vacation with Alex's family

March 9-11 - Indianapolis - Big Ten Basketball Championships with my family

mid March - India - tentative business trip for Alex. Lil and I will stay home but may make a few local trips on our own during part of this time.

early April - Harrisburg PA and surrounds - business trip for Alex with Lil and I coming along

mid June - Big Island, Hawaii - Vacation with my family

late July - France - tentative business trip for Alex. If it happens, Lil, my sister Megan, and I will go along.

It's entirely possible that in the next six months Lil will end up with two new passport stamps and dozens of hotel stays. She will be thrilled.

I am excited too. Seeing the world always gives me new perspectives on life, lots of photo opportunities, and plenty to share with you all.

The beasts will be well taken care of at home thanks to my sisters and neighbors.

I am sure there will be bumps along the way and in all likelihood some trips will be changed or put off to other dates. Rolling with the punches is part of the life lessons included in travel.

Are you looking forward to any trips?

Many links in this post go to my inspiration boards on Pinterest. The thought that I could use pins to track places I want to visit rekindled my participation in this social network. Feel free to follow me there and share your name so I can follow you.

Forcing Bulbs with Kids {Lesson Plan}

Every year I force bulbs into blooming to brighten the dull days of winter. Alex delights in the 'dominance over nature' implied by forcing but Lil and I just love watching things grow. This year, our bulbs became a science project for Lil.

child measuring amaryllis bulbLil chose several paper white narcissus and one amaryllis bulbs from our favorite local nursery, Oakland Park. Fancy-grade amaryllis can be very pricey but the $6 version thrill kids just as well as the unusual and expensive bulbs.

We set up the bulbs in little pots and jars around our dining room with south facing sun. Lil chose three that we would study.

child graphing height of flowers

We worked together to make a graph that would measure the height of the bulb. We labeled the x-axis with 'date' and the y-axis with 'height in centimeters'. We decided to measure from the top of the round part of the bulb and recorded our first height. Lil chose three symbols to represent the three different bulbs so we could record them all on the same graph.

Every two or three days, Lil measured and recorded again. After one week we had to add a second sheet of graph paper for the ever-increasing height of two of the bulbs.

In two weeks, two bulbs had bloomed and reached their maximum height. We thought we had a dud in the third bulb but now, three weeks after the forcing began, the third bulb is growing.

I used a similar set of bulb activities to teach measuring, estimation, and natural science to a class of second and third graders when I worked for Torah Day School of Virginia. They loved watching their individual bulbs grow, though we all agreed that twenty blooming paper whites in a room created an overwhelming smell.

Below, find a basic lesson plan for anyone who is unfamiliar with forcing bulbs and might want to do this with a group of children.

child measuring amaryllis bloomforcing bulbs science lesson plan

[print_this]

Forcing Bulbs Activity

Age: 6-10 years old Time: two weeks divided as 1 30-minute set up, 1 30-minute conclusion, 10-minutes every two-three days Objective: Gain experience measuring, estimating, and graphing. Observe parts of a plant and bulb growth.

Materials: 2-4 paperwhite or amaryllis bulbs per individual or small group of 2-3 students; bulbs should be specifically labeled for forcing, i.e. they have been exposed to very cold temps for at least 3 weeks. one half pint jar or other container per bulb sterile peat moss (for amaryllis) toothpicks graph paper (print your own here) foot-long ruler bamboo stake and twist ties (optional) pencil with eraser

Procedure: 1) Use toothpicks to suspend bulb just under the top of the jar or container. The thick base of the bulb should be slightly submerged in water when you fill the jar. For amaryllis, plant in a pot of peat moss with the skinny top well out of the soil.

2) Fill jars with water and water amaryllis pot.

3) Set up a graph with date along the x-axis and height in centimeters on the y-axis. Allow space for at least 14 days and 70 centimeters.

4) Use foot-long ruler to measure the initial height of all bulbs. Choose a consistent base from which to measure which might be the emergence of the white tip out of the brown bulb.

5) Every two or three days, measure height and record on the graph. Water when bulb is no longer touching water or soil is dry. Optionally, ask children to record their observations in a log for every measuring date.

Questions to pose: What is happening to the bulbs? Look on the top, the bottom, the sides. What are the parts called? Reference this bulb anatomy diagram as necessary. What do you think will happen next? How much do you think this bulb will grow in the next few days? When do you think it will bloom? What makes you think that? Which plant has grown the most? Which grew fastest? Use student generated graphs to answer.

6) As the plant becomes very tall, insert a bamboo stake in the jar/pot and use twist ties to stabilize if necessary.

7) Conclude by asking students to draw, verbalize, or otherwise express what they learned.

8 ) Enjoy the blooms!

[/print_this]

Are lesson plans something you would like to read more often? If so, what additional info do you need or what is extraneous?

Give Them Real Tools!

child using a drill with adult supervisionA huge segment of the toy industry makes kids cameras, plastic hardware tools, faux art supplies, and character-branded naturalist equipment. The motivation for such things might be pure, but they are often cheaply-made, useless imitations of adult tools. I can't tell you how many 'kid' versions of tools have met their end in our donation bin. We toss the plastic screwdriver that doesn't actually work with screws, the cheapo watercolors that have no pigment, the child-friendly measuring cups that are cute but hard to use.

Use the Real Thing What's wrong with allowing children to use the real thing? If your child is distractable, keep your hands on the binoculars as they use them. Use the DSLR camera together or give them an outdated but still functional digital camera. Your ancient point and shoot is far superior to the kiddie version.

Buy genuine artist supplies at the craft or art store. Paints and brushes might be more expensive but they outlast and outperform the kiddie versions. While you are there, invest in some real artist paper or canvases.

Provide lightweight but real hammers and let children practice aim with the possible natural consequence of hitting their thumb. Because they are performing a real and honest task, chances are good they won't even complain about a small hurt.
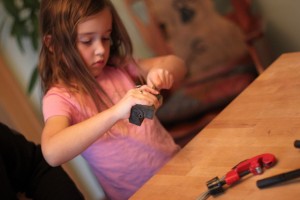
child sanding Process Not Product Young children (and most adults) learn more from the process of an activity than enjoy the eventual product. Sure, kids have great imaginations and should pretend to fly rather than actually attempt it. But when we can give our children real experience in the process of creating something, they will feel empowered. They will gain true skills and competence that faux tools do not allow.

Too Young or Too Expensive? I have high expectations for my six year old because she has been handling real tools from the moment she could handle tools at all. She has used sharp knives since she was three and power tools shortly after. Her mastery of one tool is rewarded with the next.

I believe that all kids can handle real tools when they are presented with supervised experiences from a young age. Expectations for safety must be held in the highest regard. If a child cannot handle themselves, the tool should be removed without punishment but a simple "you're not ready for this right now."

Some might argue that real tools are more expensive than the kid version. While this might be true, I think of purchases as an investment over time. It is not unrealistic to think that the genuine 6" santoku knife I bought for Lil last year will travel to college with her. Same with her quality flash light, sewing kit, and binoculars. Perhaps I actually saved money by skipping over the kiddie junk.

So what if something breaks? First, naysayers might be surprised at the durability of adult tools. Lil has dropped her ancient Canon PowerShot camera dozens of times and it still functions well.

If something does fall to pieces, so be it. Adults and children make mistakes that cause glasses to break and knives to bend. I use damage incidents to talk about whether we have a budget to replace it or if we can try to fix the broken part or if we might need to be creative and do without something for awhile. These are all natural consequences to an inevitable part of living.
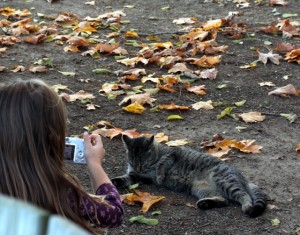
child photographing cat It's a Tool, Not a Toy The above phrase echoes around our house. Scissors are a tool and I expect Lil to use them safely or the privilege of using them is revoked. Matches must be consumed for a purpose - they are not play things. Use the strap to secure binoculars and cameras.

Lil approaches projects with sincerity towards the tools she might need. She isn't afraid of fire or sharp things because she practices using them safely under supervision. She still struggles with things that her small size body can't manage, like heavy hammers. If she comes across a project that requires a tool she isn't ready to handle, we assert ourselves as keepers of her safety and assist.

Does my daughter have good awareness because of something innate or because we encourage her to explore and create using tools? It's probably a little bit of both.

Each parent knows their child and must estimate how their child will handle a certain tool. Place safety at the forefront. Set them up for success by giving them new tools when they are fed and full of focus. Allow them to make mistakes and take time away from the project.

I know that I am not alone in raising a child who uses real tools. There are preschool classrooms of children who use saws and other mature tools. Why?

Because kids want and deserve the chance to make things.

Because trusting a child to operate a tool encourages them to trust themselves.

Because we don't know who will illustrate the world with watercolors or build inspiring houses or take amazing pictures or cook incredible dishes when they are given the right tools.
Unschooling Scope and Sequence

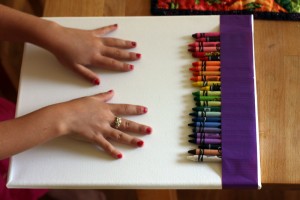
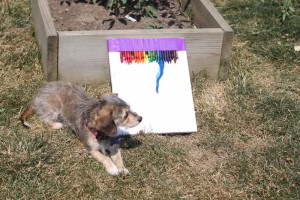
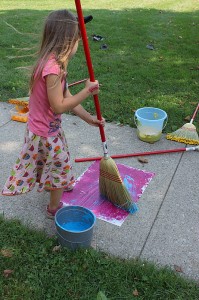
One of the requirements of the state of Ohio is that we notify our school district that we are educating at home. Another is to provide a general outline of our plans for the year. The list I sent superintendent Gene Harris was imbibed with eduspeak. Our real scope and sequence is more like this: painting a canvas ala ChihulyScope (the variety of what we teach practice together)

Life: contribute to our family and the community by daily participation in chores, projects, and social interactions feed ourselves well exercise our bodies daily monitor and provide for the plants and animals we keep develop friendships, learning to resolve conflicts, negotiate, and hear other viewpoints communicate with friends and family around the world via phone calls, text messages, and paper letters explore community norms by exchanging money, understanding traffic laws, voting, and supporting local businesses

Appreciation: observe nature, measure and count, and accumulate identifications of what lives around and among humans question the past, using first hand experiences and many sources to understand history listen, dance, and make a variety of music play and experiment with art mediums visit museums, parks, historical sites, and libraries ask questions about the world and find answers read, read, read Sequence (how we choose what to study and when)

We follow Lil's development as a natural guide for choosing what interests and activities to pursue. She is currently fascinated by the natural world, exotic places like Africa, and movement.

Alex and I empower Lil to make decisions about herself and find answers to her questions in all aspects of our daily life. We help her learn to use tools such as books, rulers, calculators, encyclopedias, cameras, maps, computers, knives, and logical reasoning to find answers. Our home, garden, and neighborhood are hers to explore.

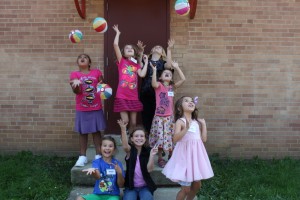
homeschool class on JapanTo ensure that Lil experiences a variety of social learning, we daily learn with others outside our home. Our weekly activities include: Monday - morning class and play with a friend Tuesday - two classes at our homeschool co-op Wednesday - afternoon at Gram and Tompa school (Alex's parents) Thursday - gym and pottery at rec center Friday - field trip with friends Saturday - home, field trips, family Sunday - home, field trips, family

If Alex's work travel schedule aligns with my cooking class schedule, we will travel at least every other month this year. We may be able to accompany him to India, Philadelphia, Arizona, and/or France this year. Family trips to Athens, Ohio (October 2011) San Salvador Island (February 2012) and Hawaii (June 2012) are already in the works.

With a month of official homeschooling (but no travel other than Urbana, boo) under our belt, I am loving the freedom and opportunities we have with this learning situation. Lil is not the only student - her questions prompt Alex and I to inquire, study, and take on new projects. We truly enjoy building our lives around this fascinating world.

What's the scope and sequence of your current life?

PS. Lil is recording some of her experiences in her own words at her blog, Lil's Dot Com.

Added to Simple Lives Thursday.</em>

Family Attractions in Urbana, Ohio {Day Trip}

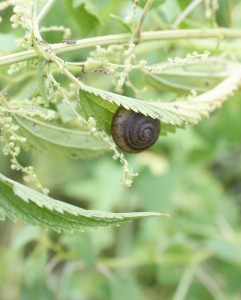
snail at cedar bog in urbana One weekday this summer, Lil (age nearly 6), Anna (20 year old Japanese exchange student) and I took a day trip to Urbana, Ohio, approximately fifty miles from central Ohio. A simple drive west on 70 and north on 29 led us first to Cedar Bog State Nature Preserve, park reviewed here.

After a lovely hike in Ohio's largest public fen, we ate lunch in town. The pizza joint we picked was a poor choice - overly salted crust, loud Christian music, and cheap toppings. Next time we visit, I will check out Mumford's Potato Chip & Deli because the bagged chips we picked up were delightfully crispy and fresh.

Next we headed up to Freshwater Farms of Ohio. My farm profile has more details about the farm's petting zoo, store, and Shrimp Fest.

We spontaneously ended our day at the Johnny Appleseed Museum. Read my full museum review for more about the tiny museum packed with fascinating information.

In a short day away from Columbus, Urbana treated us to new perspectives on nature, homegrown tastes, and exciting history. We will surely return to explore more of what this nearby gem of a town has to offer.


Our trip was not paid or otherwise sponsored. We just really enjoyed our visit and wanted to share!

Johnny Appleseed Museum Urbana, Ohio {Profile}

As we were driving out of Urbana after our walk at Cedar Bog and trip to Freshwater Farm, the city pulled us in again. My apple-loving self spied a sign for the Johnny Appleseed Museum and had to follow it. playing games around apple shaped tableThe one room museum is nestled in Bailey Hall at Urbana University. Bailey Hall is the first building on the right on top of the hill as you enter Urbana University, a fact I wish I'd known as we circled around the tiny campus several time before locating it.

Stepping into the small museum, I expected we might stay 15 minutes, maybe 20. Thanks to recent renovations that include interactive displays and games, tired Lil, Anna and I stayed about an hour.

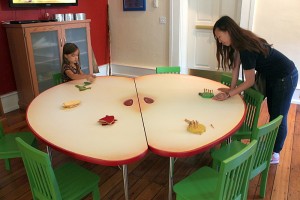
We chatted with other guests, watched the classic Disney short on Appleseed, played apple games on their awesome apple tables (I want!) and read well illustrated signs about Chapman's work as an apple grower and Swedenborg missionary. (There is a Swedenborg bent, as the University is affiliated with the Swedenborg movement and the church helped fund the museum renovation.) We also enjoyed the displays of Johnny Appleseed memorabilia.

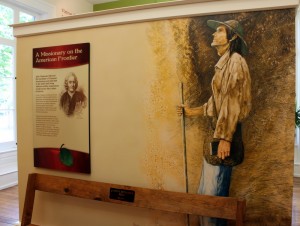
johnny chapman diplay at urbana museumI learned that Appleseed was an herbalist who advised early settlers about plants that can heal. I read about where Chapman visited Ohio and enjoyed the pictures of Appleseed trees, including several on the Urbana University campus. I did not take time to page through the wall of additional texts and resource binders available to researchers and teachers.

What I appreciated most about the Urbana Johnny Appleseed Museum was the way in which the legend and truth were presented side by side to let visitors discover what was embellishment and fact.

If you go:

  • Visit Tues-Fri, from 10 to 2pm; Sat, noon to 4pm or by appointment.
  • Study up about Appleseed before your visit.
  • Be ready to browse their small but well curated gift and book shop.
  • Consider bringing a cash donation to support the museum.

Johnny Appleseed Museum on Urbana University Campus Bailey Hall 579 College Way, Urbana, OH Urbana, Ohio 43078

Phone: 937-484-1303

 Read about our whole day in Urbana, Ohio.