Bison Jerky - A High Protein Snack {Recipe}

dried bison jerky recipe

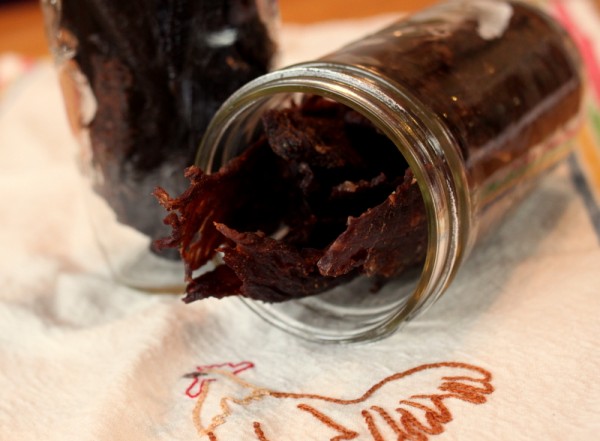
Jerky. This unattractive but nutritionally dense snack is something my family often neglects for months at a time. Then we'll remember and binge on homemade meat treats again.

Jerky appeals to the current paleo, low-carb, and low-fat diets. It's also free of most allergens and simple to make without extra equipment; we made it for many years in the oven before adopting the neglected dehydrator living in my parents' basement. Like many good things, jerky takes some time but not much active interaction. You simply cut the meat, marinate overnight, and dry the next day.

Lower fat meats work best for jerky. Turkey jerky, made from a whole turkey breast, is one of our favorites. This time around we used bison from Ohio Bison Farm for a beefy flavor.

slicing bison for jerky bison sliced for jerky
Cutting the meat is the most skill-intensive step. The goal is evenly thin pieces that will dry in the same amount of time. Be patient and unafraid to use a meat tenderizer if necessary.

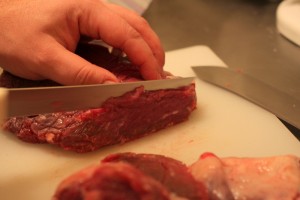
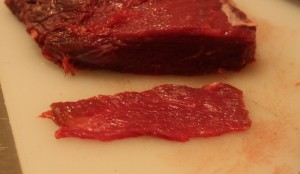
Whether you cut with or against the grain is up to you. Cutting with will result in a chewier product, against is more tender but may fall apart in a finely grained cut of meat.

jerky marinade bison in marinade
The marinade does contribute to preservation but is not critical. You can make totally unseasoned jerky if you wish. We find that a balance of acid from vinegar or lemon juice, salt, a small bit of oil, and spices makes the best flavor. The two recipes below are ones we honed after a decade of experimentation. Feel free to tweak them to your tastes or ingredient availability.

bison jerky dehydrating

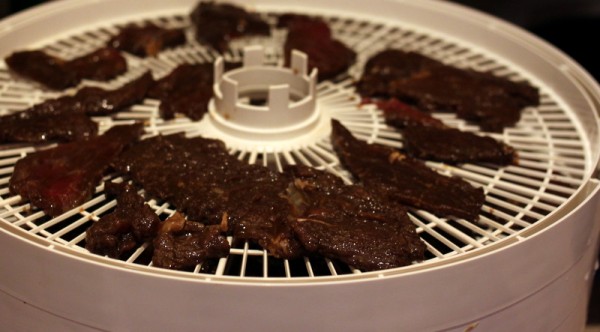
Dehydration provides the preservative effect. The USDA recommends starting the drying process by heating the meat to 160 degrees F and then dehydrating at 140 degrees or the lowest temperature your oven will allow. Our dehydrator has a maximum temperature of 145 degrees F which is what we've always used.

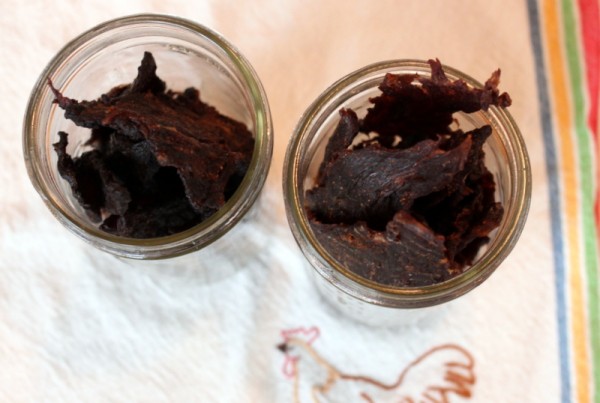
Store jerky in a glass jar or other air-tight container in a cool dry place like a kitchen cupboard for up to two months. You may also freeze jerky.

The whole family will be at the Clintonville Farmers' Market this Saturday, January 26, from 10:30 - 12:30 drying and sampling jerky. Stop in to shop for local foods and talk to us!

homemade jerky in jars

Bison Jerky Makes about 30 large pieces to fill quart jar Time: 2 days, 30 minutes active

1 pound bison roast per marinade recipe below; our four layer dehydrator can fit 2 pounds

Teriyaki 1/3 cup soy sauce (use wheat-free for a gluten-free product) 3 tablespoons rice vinegar 2 teaspoons honey or granulated sugar 2 tablespoons water 10 grinds black pepper 1 teaspoon ground dried ginger 1 teaspoon garlic powder 1 teaspoon sesame oil 1 tablespoon olive oil dash Sriracha (optional)

OR

Down East 2 teaspoons Old Bay seasoning 1 tablespoon honey 1 tablespoon lemon juice 1 teaspoon salt 1/2 teaspoon garlic powder 1 tablespoon olive oil 1/2 teaspoon paprika 1/2 teaspoon chili powder

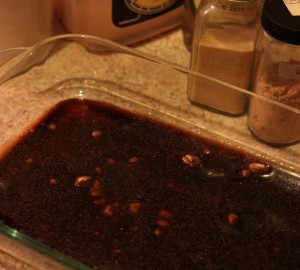
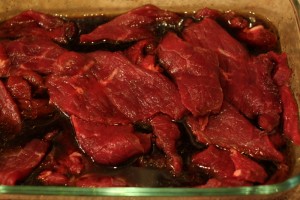
1. Slice bison roast into very thin (1/8 inch) pieces. Pound uneven pieces thin with a meat tenderizer. 2. Mix all ingredients for one of the marinades and place in non-reactive glass or plastic pan. 3. Add jerky to pan, mix and cover. Marinate in refrigerator 24 hours. Stir once during this resting period. 4. Place meat in a single layer in a dehydrator or on cooling racks settled on cookie sheets. Dry at 145 degrees F or in a very low oven (as low as yours goes, or 200 degrees F with the door ajar) for 5-8 hours or until jerky is dry throughout and yields no moisture when broken in two. 5. Allow to cool. Store in an airtight container for up to two months.

Homemade Bitters {Recipe}

homemade bitters recipes Cocktail drinkers know that a Manhattan isn't a traditional Manhattan without Angostura bitters and one can't make a Sazerac without Peychod's. But home mixologists might not know how simple and fun it is to make bitters and home.

What are Bitters?

Bitters are strong herb and spice alcohol infusions including at least one bittering agent like cassia, wormwood, quinine, citrus peel, or gentian root. A drop of flavorful bitters is the strong guest that holds the door open for the remaining sweet and sour seats around the table.

Bitters were born of the ‘tonic’ movement, a period in the mid 1800s - mid 1900s where people claimed to cure all with drinks flavored with herbs and spices. They were commonly consumed neat or over ice as digestifs. A culture of secret recipes and labels listing the afflictions for which each bitters were recommended surrounded the compounding craze.

Now, bitters are most commonly used in cocktails. Bitters support a drink with complexity that is notably absent if the mixologist neglects to add a drop or two. Creating bitters at home is one way cocktail makers can customize a drink recipe.

How to Make Bitters

1. Mix spices into alcohol. 2. Allow to age for up to three weeks at room temperature, tasting along the way to determine when the flavors reach your taste's desired strength. 3. Strain out solids and reserve alcohol. Dilute with a slight bit of water if desired. 4. Bottle and store in a cool dark place.

Because one only uses a few drops of bitters at a time and some of the ingredients are expensive, it is best to make very small batches. Organic bitters spices are available locally in tiny quantities at Clintonville Community Market and online through sources like Mountain Rose Herbs and Frontier. I like to store mine in dark glass bottles with eye droppers, available at Amazon and Mountain Rose.

homemade bitters in blue glass jar

Bitters Recipes

I created and tweaked the recipes below to my taste. Participants in my recent Infusions and Bitters class at Franklin Park Conservatory enjoyed them and many left planning to make bitters as gifts this holiday season.

Cocoa Bitters 1 teaspoon cacao nibs ¼ teaspoon sarsaparilla ¼ teaspoon orange peel ¼ teaspoon wild cherry bark 1 allspice berry 1 inch length of cinnamon stick ½ cup rum

Turkey Day Bitters 2 inches fresh rosemary 2 inches fresh sage ¼ teaspoon pink peppercorn ¼ teaspoon gentain root ¼ teaspoon juniper berries 150 mL vodka

Rachel’s Bitters 3 allspice berries 1 star anise ¼ teaspoon each pink peppercorn, gentain root, wild cherry bark, lemon peel, sarsaparilla 150 mL vodka

kitty likes bitters

Even our kitty Moonshine was interested in bitters as I was photographing! Try making bitters yourself and see what flavor magic you can create.


Local notes:

1) I run a monthly co-operative buying group for Frontier herbs, spices, bath and body supplies including bitters ingredients and bottles. If you live in Columbus and are interested, contact me.

2) I am hosting a Gifts In Jars event at City Folk's Farm Shop, 4760 N High St,  this Friday November 23. I will have everything you need to make and label a beautiful Weck jar of hot cocoa mix, bath foam, or culinary herb salts with custom flavors. Each jar costs $6, will take about 10 minutes to make and the mess stays out of your house. Drop in anytime between 11 am - 2 pm this Friday.

Ketchup, For The Good Times {Recipe}

homemade ketchup recipe Some preserves are easy, some are drastically cheaper than store-bought, and some are tastier than anything you can buy. Alas, homemade ketchup is none of these things.

So I can't exactly explain why I make it every year.

I suppose I can ketchup because processing all the jars of regular sauce becomes boring. And when I'm in the midst of tomato madness, condensing a little puree with spices isn't any extra trouble - it is, in fact, a welcome chance to do something different.

Last year I improved my ketchup method by cooking the sauce down in a slow cooker. This prevents the bottom from scorching and makes it easy to leave the house or do other chores during the lengthy, oh so lengthy, cooking period.

While ketchup doesn't meet any of my traditional characteristics of a recommended preserve, HITK readers have ask for my recipe. Here it is:

ketchup recipe in slow cooker

Homemade Ketchup

Makes: approximately 5 pints Time: 12 hours cooking, 30 minutes active

1 teaspoon olive oil 1 whole onion, diced 2 quarts tomato pulp (most easily made with a food strainer and sauce maker tool, or made by stewing tomatoes and running through a manual foodmill to remove skins and seeds.) 1 cup brown sugar or honey 1/4 cup apple cider vinegar 1 teaspoon garlic powder sachet of whole aromatic spices (your choice of bay leaf, cinnamon stick, cloves, allspice berries, juniper berries, celery seeds - I use a little of each) 1 teaspoon salt 1/2 teaspoon white pepper 1/2 teaspoon lemon juice per pint

1. Heat a medium sized pot over low heat. Add olive oil and onions. Cook until translucent, approximately 10 minutes. 2. Add onions and remaining ingredients except for lemon juice to a slow cooker*. Turn slow cooker on high and allow to simmer for 3-4 hours. 3. Remove spice sachet and set aside. Puree mixture with an immersion blender. 4. Replace spice sachet and continue to cook for 3-4 hours. Taste (don't burn your tongue!) and adjust salt, pepper, vinegar, or sugar as you see fit. 5. Continue cooking and tasting until tomato is of ketchup consistency. This may take an additional 3-4 hours. 6. Ladle hot ketchup into sterile jars with one half teaspoon lemon juice per pint. Wipe rims, place on two part lids, and process in a water bath for 35 minutes/pints, 40 minutes/quarts. Remove from water bath, cool, and store properly.

*Don't have a slow cooker? Use a medium pot on low heat, uncovered, and stir frequently to be sure the bottom does not burn.

This post, with much respect for the A Prairie Home Companion, brought to you by the Ketchup Advisory Board.

Pressure is On! Canning Sweet Corn

corn for pressure canning I finally did it. I bit the bullet and tried pressure canning. I chose canning corn for my first project because it is abundant right now and I generally like store-bought canned corn.

To begin, Alex and I husked 4 dozen ears of fresh, non-GMO corn from Bird's Haven Farms. I cut kernels off the cobs while a large pot water boiled on the stove and the jars and lids sanitized in two additional pots of boiling water. Yes, I'm glad that our heat wave finally broke and the kitchen stayed at sub-sauna temperatures!

sweet corn in jars for canning

I loaded the raw corn into the jars, pouring boiling water over top and released air bubbles with a sanitized thin knife. I read the instruction manual and adjusted the canner weight for 10 pounds of pressure. Then I placed on the two part lids, put the jars in the canner, twisted the lid closed and turned up the heat.

My sweet corn and I survived to report that pressure canning is no more trouble than water bath canning. The only difference, really and truly, is the annoyance of the sputtering canner sound. For sweet corn, you must endure the hissing for a full fifty five minutes. I recommend leaving the kitchen and doing something else during the processing, lest your ears bleed from the racket.

lifting jar out of pressure canner

The canner had to cool for a full half hour before the seal released. All six jars sealed within minutes of being removed from the pot. Sweet!

Only time will tell if home canned corn texture is something I enjoy eating, but at the very least this batch taught me that pressure canning is nothing I should fear. Low acid vegetables, stocks, and meats - the pressure is on!

Have you ever pressure canned? What do you think about it?


Added to Simple Lives Thursday #110

Tattler Reusable Canning Lids Review

tattler reusable lid review During nearly every canning class and many weeks at the farmers' market I am asked about Tattler Reusable Canning Lids. I bought some to try at Lehman's an age ago and finally canned my first 2012 batch of strawberry honey jam using the lids last week.

How Tattler Lids Work

Tattlers are a three piece lid system consisting of a plastic lid, rubber ring, and metal ring not included but reusable from the standard metal ring and lid system. The plastic lid and rubber ring must be cleaned and warmed in a simmering pot of water before placing them on the jars.

lids and rings on stove

The glass jar rim must be completely clean and dry for the rubber to seal. The ring is tricky to retrieve from the boiling water and more difficult to center on the rim than the metal lid. Once the ring is placed, the plastic lid must be placed directly on top and the metal ring secured but not totally tightened.

Then jars go into the waterbath as usual. Immediately upon removing them from the waterbath, the rings must be tightened fully, an additional burn-risking step to the standard metal ring and lid system. There is no characteristic 'ping' sound, so seals must be tested manually by picking up the jars with the edge of the lid after jars have cooled completed in twenty four hours. Raised letters on the lid prevent labels from laying flat and most would not want to write on the lid because it is reusable.

Tattlers are reusable, made in the USA and BPA free, claims that standard metal lids cannot make. For people who can often to feed their family the best local food, investing in lids that do not contain a dubious chemical and are reusable makes good sense.

tattler lids on jam jar

My Tattler Lids Review

One out of seven jars with Tattler lids failed to seal in my first experience. Using metal lids for hundreds of jars in the last decade, I have only had two seal failures. Other canners seem to experience more sealing issues with Tattlers than regular lids too.

I wish the three part lids were easier to use. I scalded my fingertips with boiling water trying to get the lids on center and I still failed with one. Perhaps with practice and a tiny set of tongs, I could learn how to set the lids more quickly and accurately.

I also desperately missed the ping noise. Canning is a multi-sensory experience for me and without the auditory signal that my work was complete, I felt unfulfilled. I didn't like having to wait to test the seal for 24 hours, not to mention that the unsealed jar could be growing bacteria during that time.

To use Tattlers more regularly, I would need to find a new labelling method. I'm against labelling on the jar because labels are hard to remove and difficult to see when organized in boxes on my larder shelves. I'm curious how other Tattler users label their jars.

At nearly a dollar each, Tattler lids are five times as expensive as metal ones. I would not be willing to give away a jar with a Tattler lid except to my most-trusted friends whom I know would return them.

Tattler lids used to only be available with a lengthy drive or by mail order. City Folk's Farm Shop will begin carrying them early next week. City Folk's is offering Hounds in the Kitchen readers a special price of $9.75/dozen regular mouth and $10.50/dozen wide mouth on one package through June 10th. Just tell them you heard about Tattler's here.

tattler lid and rings

Conclusion

Pro: BPA free, reusable, made in the USA

Con: more difficult to use correctly, risk of not sealing, expensive, no ping, harder to label lid

I don't see myself using Tattlers regularly for jam canning, especially as I love to give a jar of jam as a gift. I will reuse the ones I have with highly acidic foods like tomato sauce that are most prone to leaching BPA.

Have you used Tattler lids? What do you think?

Disclosure: I paid for my own Tattler lids to review. The first link in this article is an Amazon Affiliate link. City Folk's Farm Shop is a social media client.

Added to Simple Lives Thursday #98.