
Infographic impact report of the Produce Perks Columbus / Veggie SNAPS network
Read more2017 Highlights: Foraging Nettles {Video}
Video of foraging for wild nettles
Read moreLong Island Cheese Pumpkin {Favorite Flavors}
pie pumpkins before roasting
Have you ever had finger-licking good pumpkin?
You might think that such a thing doesn't exist. Truthfully, I didn't either. I am disappointed by watery, slightly bitter squash every time I roast a pie pumpkin. I honestly usually enjoy the roasted seeds more than the pumpkin.
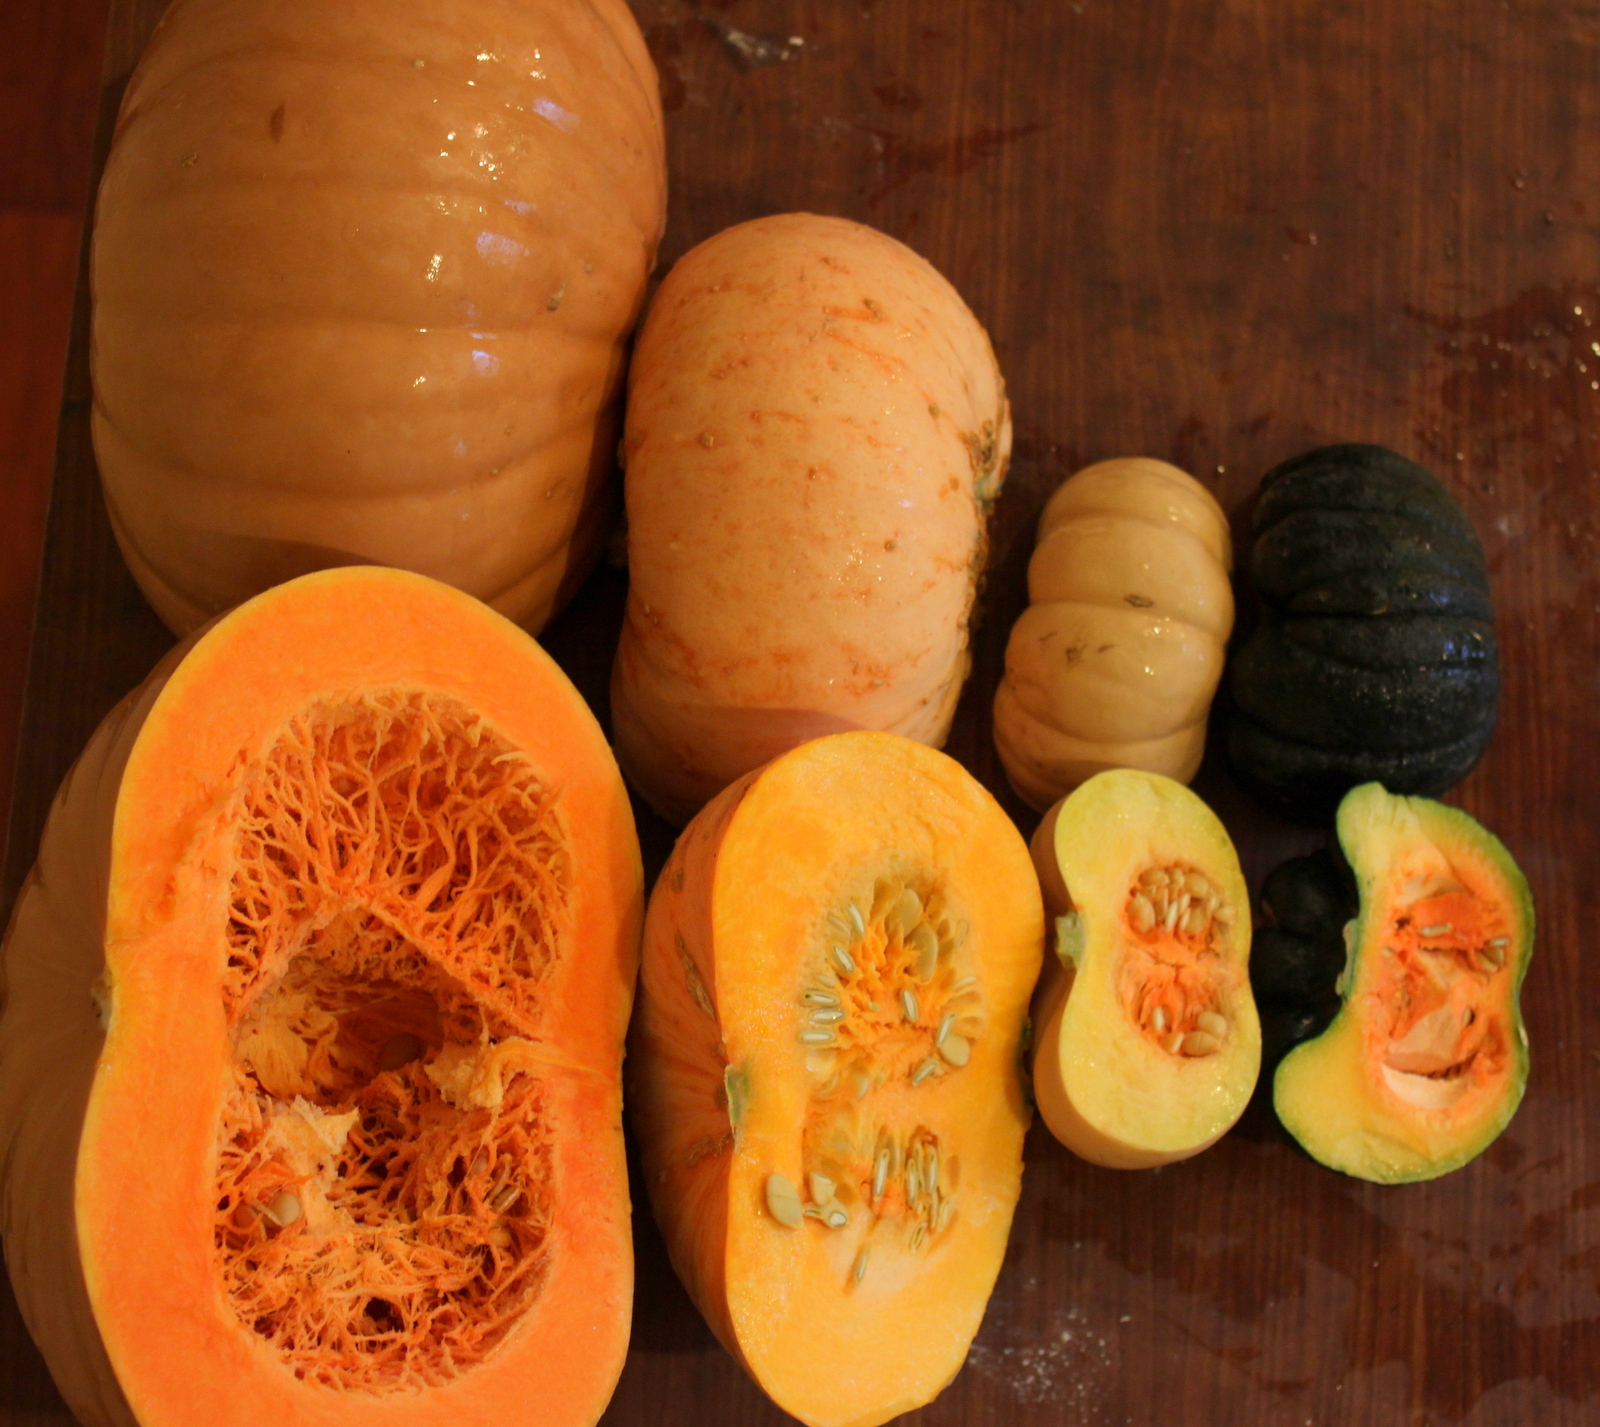
That is, until my farm friend Al from Stonefield Naturals gave me four heirloom winter squash to compare. Four deeply autumnal colored skins, four textures of flesh, four sizes of seed.

roasted pie pumpkin
I took the variety to a potluck dinner. We scooped the oven-roasted squash plain to taste all the nuances of the flavors.
Long Island Cheese, the biggest squash, won every person's vote. The dusky sunset-colored skin yields fully cooked, deep orange flesh after a fourty-five minute roast in a medium oven. Buttery in texture and mildly sweet, the Long Island Cheese flavor embodies everything great about fall - warmth, richness, settling earthiness.
I shared cold puree with friends who couldn't believe I'd added no sugar, no fat, or seasoning. The Long Island Cheese is scrumptious all on its own. I couldn't help myself but lick my fingers as I pressed the roasted squash into jars for storage and I keep coming back to the fridge for spoonfuls.

wp-1447451390111
You can bet I'll buy some more of these beauties from Al at the Worthington Indoor Farmers' Market before the season ends. They're going in my garden plan for next year too - Baker Creek caries the variety if you can't get your hands on seeds to save.
What's your favorite flavor these days?
Phyllis's Gingerbread Cake {Recipe}
 It's young ginger season again at Swainway Urban Farm! We love growing this beautiful tropical plant and enjoying the mild, clean flavor of the young ginger.
Last year some time, my mom mentioned my Grandma Phyllis's ginger bread recipe. We didn't eat it much growing up so I adapted it with our fresh young ginger and whole ingredients to try. Here's a cake I can love!
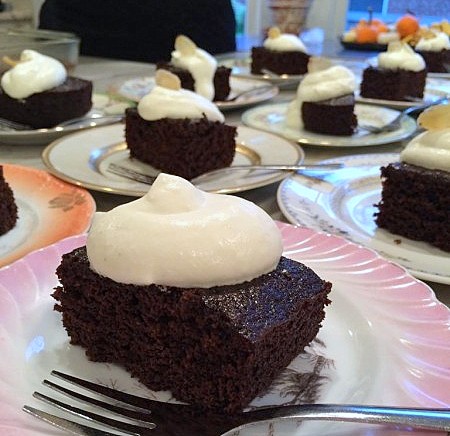
I've made this dark, molasses-sweetened cake several times since, including at a recent Seasoned Farmhouse class. Everyone enjoyed the simple, rich flavors.
This gingerbread easy to make, requiring no stand mixer and few dishes. Freshly whipped cream lightens and smooths the rich flavors. Try this recipe for the holidays or any time you want a special autumnal treat.
Grandma Phyllis's Gingerbread Cake
Makes: 8x8" cake, approximately 9 servings Time: 45 minutes
1/4 cup unsalted butter + extra for greasing pan 1/4 cup white sugar 1/2 cup molasses 1 egg 1 small thumb young ginger, grated 1 1/4 cup all-purpose flour 3/4 teaspoon baking soda 1/2 teaspoon cinnamon 1/4 teaspoon cloves 1/4 teaspoon salt 1/2 cup hot water Whipped cream, sweetened and flavored to your liking, optional but highly recommended.
1. Heat oven to 350 degrees F. 2. Butter an 8x8 glass baking pan and set aside. 3. Melt butter in small sauce pan, allow to cool slightly. 4. Transfer butter to a medium bowl. Add sugar, molasses, egg, and ginger and whisk together until smooth. 5. In a separate bowl, stir together flour, soda, cinnamon, cloves, and salt. Meanwhile, heat water. 6. Alternately add flour mixture and hot water to butter mixture, stirring until smooth after each addition. 7. Bake for 35-45 minutes or until cake tester inserted in middle comes clean. Allow to cool before serving with freshly whipped cream.
The Luxury of Boiled Eggs {Recipe}
 Before raising chickens, I would never have imagined myself longing for a boiled egg. I rarely made them, and when I did, they were often over cooked because I tend to wander and forget about timers. But now I give them my full attention from choosing the right egg to measuring the cooking time to peeling and savoring the final egg. Backyard chicken boiled eggs are a rarely enjoyed luxury item around here, one we're just returning to now that our replacement flock is laying eggs after the fox attack.
You see, fresh chicken egg shells are stuffed full of albumin and yolk. The semi-permeable shells allow in the tiniest bit of air which forms a bigger pocket of air over the weeks of the eggs' shelf life. This air pocket is why you can tell if an egg is still good by soaking it in water - too much air and you can assume the egg is very old and potentially spoiled - and it's also what allows you to peel a boiled egg.
Before raising chickens, I would never have imagined myself longing for a boiled egg. I rarely made them, and when I did, they were often over cooked because I tend to wander and forget about timers. But now I give them my full attention from choosing the right egg to measuring the cooking time to peeling and savoring the final egg. Backyard chicken boiled eggs are a rarely enjoyed luxury item around here, one we're just returning to now that our replacement flock is laying eggs after the fox attack.
You see, fresh chicken egg shells are stuffed full of albumin and yolk. The semi-permeable shells allow in the tiniest bit of air which forms a bigger pocket of air over the weeks of the eggs' shelf life. This air pocket is why you can tell if an egg is still good by soaking it in water - too much air and you can assume the egg is very old and potentially spoiled - and it's also what allows you to peel a boiled egg.
A plucked-from-the-nest-box-this-morning egg has a negligible air pocket and if you boil it, you have a 1 in a million chance of peeling it easily. Most likely you'll spend ten minutes picking away minuscule bits of egg shell. After a couple trips down that road, I started trying old wives tales like adding salt or vinegar to the water. No dice.

I didn't find boiling egg nirvana until I considered the brilliance of the shell. The shell is meant to keep the yolk fresh until the hen has laid a dozen or so eggs over a dozen or so days for a clutch. The container then has to handle high heat and movement while a hen incubates the egg for another twenty one days. In nature, egg shells are designed to keep their contents safely held for at least four weeks! No wonder they don't want to give up easily in the kitchen.
My process for boiling eggs now takes over a week of preparation and consideration.
Hard Boiled Backyard Eggs
1. Wash fresh eggs. This removes the "bloom", a coating that seals in the egg's moisture. Allow them to drip dry.
2. Place eggs in the fridge for about a week, uncovered. Refrigerators dry their contents due to the lower temperature and humidity. Commerical egg producers often use syrofoam, plastic, or coated cardboard egg cartons to keep a little bit of moisture around their eggs. We want the eggs to dry out a bit, so I skip the cartons and use the egg tray that came with my fridge.
3. Boil minimally. I like room temperature eggs in room temperature water, brought to a boil quickly. Then I cover the pot for 10 minutes. Alex prefers 11 or 12 minutes.
4. Chill instantly. When the timer goes off, uncover the lid and run cold water over the eggs and/or fill the pot with ice. This stops the eggs from continuing to cook.
5. Peel and eat happily. Eggs will peel without much effort. I enjoy boiled eggs as is, made into egg salad or deviled eggs, or the most extravagant preparation, Scotch Eggs.

File this under "Things You Don't Know Until You Raise Chickens". What else would you add to that list?
Homemade Celery Powder {Recipe}
 Swainway Urban Farm grew beautiful, strong celery this year. The stalks were dense in flavor and texture and sold with the abundant tops. This variety isn't well suited to eating as a veggie stick but perfect for cooking. I roasted it, added it to stock, and made a cream of celery soup that even satisfied picky Lil.
One bunch of celery yielded almost eight cups of leaves. Thanks to my friend and fellow farmers' market junkie Jenn, I knew just what to do with them so that I could savor the local organic celery flavor for months to come.
Swainway Urban Farm grew beautiful, strong celery this year. The stalks were dense in flavor and texture and sold with the abundant tops. This variety isn't well suited to eating as a veggie stick but perfect for cooking. I roasted it, added it to stock, and made a cream of celery soup that even satisfied picky Lil.
One bunch of celery yielded almost eight cups of leaves. Thanks to my friend and fellow farmers' market junkie Jenn, I knew just what to do with them so that I could savor the local organic celery flavor for months to come.
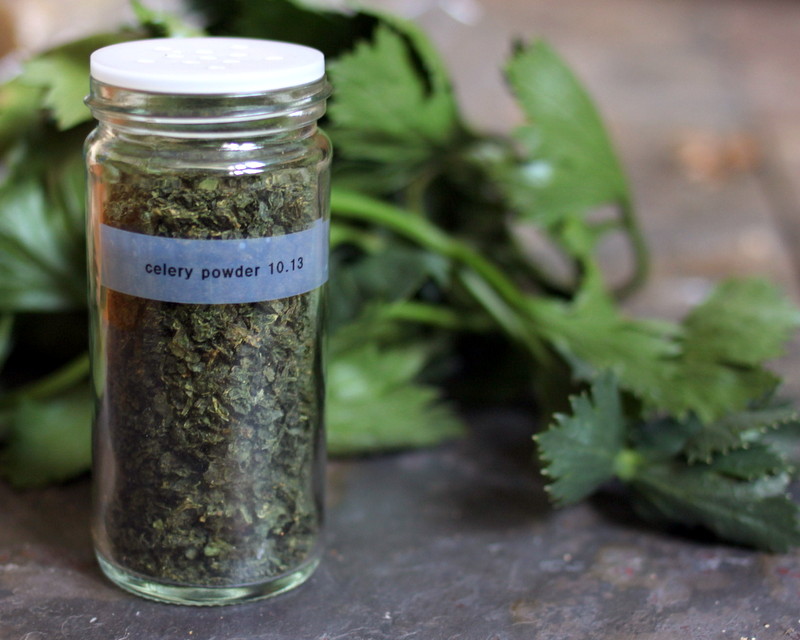
I made a spice!*


After a simple wash, zip in the hated food processor, and 12 hours in the dehydrator, the kelly green leaves reduced to mere ounces of dried celery powder.
Celery powder, like celery itself, is a natural source of sodium nitrate. Sodium nitrate is what turns into sodium nitrite in our digestive system. And sodium nitrite is the reason bacon tastes like bacon and corned beef tastes like corned beef - it's antimicrobial and piquant and completely delicious.
Anything you cook with a sprinkle of celery powder becomes more tasty. Add some to a rub for meat or a stew for another layer of flavor. Keep it on hand for soups when you run out of celery. Make it a part of dressings, sauces, and dips. I aim for my pantry to never be without celery powder again.

Celery Powder Makes: 2 ounces Time: 12.5 hours total, 20 minutes active
8 cups celery leaves (very fresh, organic celery is best because it has the best flavor) 1/2 cup water
1. Wash celery leaves and place in food processor while damp. 2. Pulse in the food processor, adding up to 1/2 cup water, until leaves are finely chopped into a thick puree. 3. Spread in a thin layer on fruit leather tray in a dehydrator. (It may be possible to dry the puree in a very low oven on a parchment- or silicone- lined cookie sheet.) 4. Dehydrate for 8-12 hours at the dehydrator's lowest setting, stirring to ensure that all leaves are dehydrated completely. 5. Crumble in your fingers as you fill a spice jar with the powder. For a finer powder, mill in a mortar and pestle.
*Semantics among you might argue that celery powder is a dried herb. But I put it in a spice jar in the spice drawer, so I'm calling it a spice.
Ginger Raw Honey Syrup {Recipe}
 It's baby ginger season again!
Swainway Urban Farm is harvesting several dozen pounds of Hawaiian baby ginger each week. Unlike the grocery store stuff, fresh young ginger doesn't need to be peeled and has a pleasant crisp texture when raw. The flavor is complex and well-rounded with an alluring floral aroma.
I enjoy chopped pieces raw in stir fry or soup. A savored slice settles the stomach while making me feel alert*. Sadly, fresh ginger doesn't last long (though you can freeze it) and some members of my family don't like it raw.
So what else can I do to enjoy the delicate aroma and mild flavor? How about syrup?
I started by making a very strong tea of simmered roughly chopped pieces (including the stems and roots). To sweeten, I added raw local honey, a healthy, immune-boosting sugar*, after the tea cooled.


The resulting ginger raw honey syrup is the best thing I've made in months. It is sweet, flowery, and soothing. I 'prescribed' a shot in tea to Alex when he was complaining of an upset stomach*. Combined with soda water, the syrup makes top-notch ginger ale. And I can attest it pairs well with rum and whiskey.
I estimate this syrup will last in the fridge for at least a month. I'll report back on experiments with canning and fermenting some to further extend the shelf life through the winter cold and flu season.
In the meantime, find some baby ginger at the Clintonville Farmers' Market and make this healthful* and tasty syrup for yourself.

Ginger Raw Honey Syrup
Makes: 3-4 cups Time: 45 minutes
2 cups scrubbed fresh baby ginger, chopped 4 cups water 3/4-1 1/2 cups raw local honey, to taste
1. Gently simmer ginger and water in a heavy bottomed pan for 30 minutes. Allow to cool to room temperature. 2. Pour ginger tea through a strainer to discard ginger pieces. 3. Add honey and stir vigorously. 4. Store in the refrigerator. Use as a base for ginger ale, cocktail mixer, addition to hot tea, or sip as a health tonic*.
*Health-related statements have not been approved by the Food & Drug Administration, who is shutdown and can't approve anything right now. Cultures around the world have eaten ginger and honey in various forms to treat a multitude of symptoms so I defer to their wisdom and my personal experience.
Pea Shoot Pesto {Recipe}
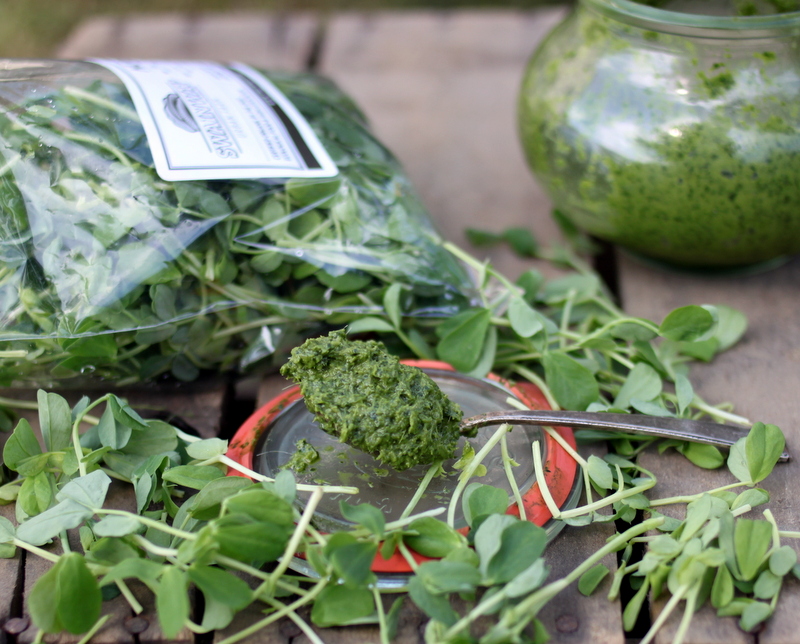
Pesto is the simplest sauce in the world. All you need are fresh herbs, a little salt, and oil. Basil is traditional but you can use any seasonal herb. You can even use a mortar and pestle or lots of knife work instead of a blender or food processor.
And yet, there are secrets to making a bold, balanced pesto.
First, don't skimp on the fat. Oil creates a smooth texture while holding the color and flavor of the herbs. Use high quality oil because the flavor comes through the final product. Oil also tones down the strong flavor of the greens. To prevent freezer burn, top a container of pesto with a layer of oil before freezing.
Always add a little acid. A splash of lemon juice or vinegar balances the richness of the oil and preserves the color.
Experiment seasonally. Basil pesto is a classic in the summer but don't leave pesto behind in the other seasons. Play with spinach and kale in the fall and microgreens in the winter and spring. I developed this recipe for customers of Swainway Urban Farm to sample at the farmers' market. Simply adapt the recipe below to your ingredients on hand!
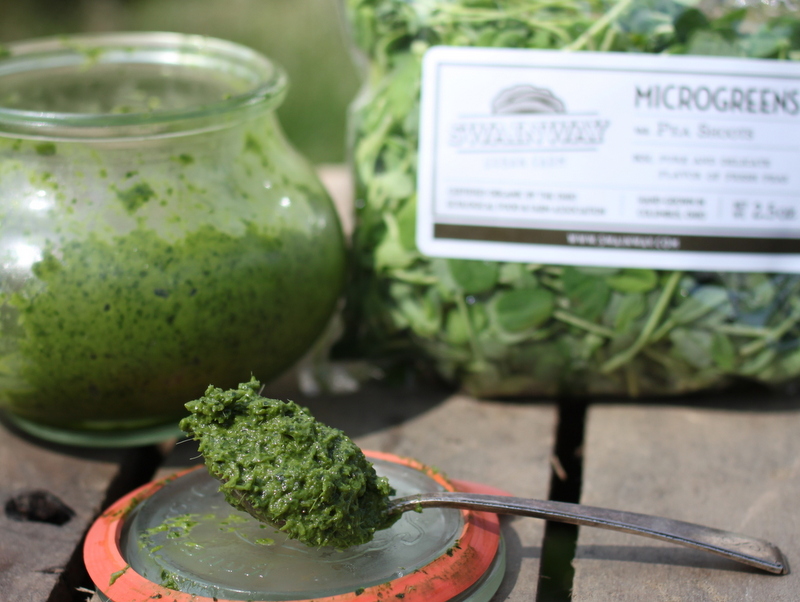
Pea Shoot Pesto Recipe
2-3 garlic scapes (1/4-1/2 cup) or 1-3 cloves garlic 1 bag (2.5 oz) fresh pea shoots 1/2—1 teaspoon salt 1/3 cup olive, grapeseed, or sunflower oil 1 teaspoon white or rice wine vinegar
1. Wash scapes, removing both ends, or peel garlic. Chop roughly. 2. Place garlic, peashoots, and salt in food processor or blender. 3. Blend, drizzling in oil and vinegar as the mixture purees to your desired consistency. 4. Serve as a dip with veggies, spread for bread, or sauce for pasta. 5. Store in the fridge with a light covering of oil for up to ten days or freeze for future use.