
 Oh, lard. Mention the word and some people turn up their noses, remembering days of eating cookies that tasted like pork. Others are curious, having never eaten lard to their knowledge. And then there are those of us whose faces break into knowing smiles.
All About Lard
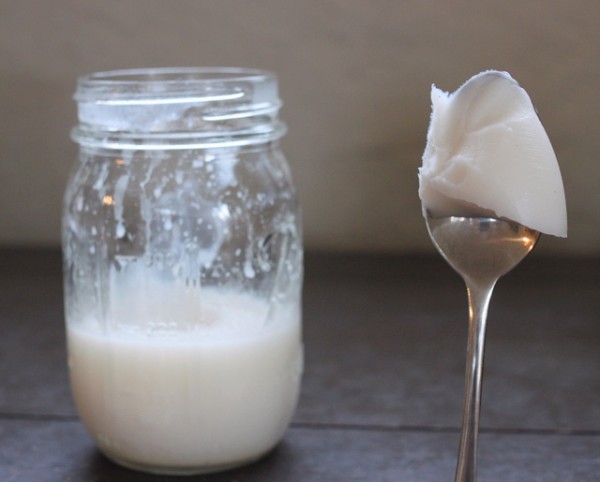
High quality lard is a pure-white fat. It remains solid at room temperature. It should smell only slightly porky, if at all, and that flavor bakes away when cooking.
Home-processed pork lard is arguably healthier than vegetable shortening because it doesn't contain trans or hydrogenated fats. It contains less saturated fat than butter and is 45% monounsaturated fat, one of the more heart-healthy kinds. Lard also contains vitamin D naturally.
Pay attention to lard labels if purchasing - some are hydrogenated to be shelf stable which transforms some of the good fat into trans fats. Others contain preservatives like BHT which you may want to avoid. I recommend buying directly from a local pork producer like Morning Sun Organic Farm.
How To Make Lard
Start with high quality pork fat from around the organs (leaf lard) or body of the animal. When we recently slaughtered and butchered a Large Black pig from Six Buckets Farm, we ended up with 18 pounds of fat unattached to muscle cuts. Lyndsey, the farmer, was concerned that we might be upset with the excess fat, but I assured her we knew what to do with it.
 Set up a rendering pot, a heavy bottomed non-reactive lidded pot over an adjustable heat source. Some prefer to do this outside over a propane stove because the slightly porky smell can bother some folks. A crockpot set up in a garage or porch is another idea.
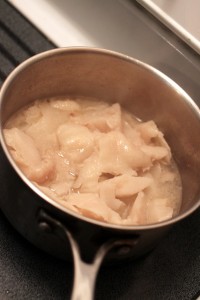
Add in your pork fat, ideally fresh and chunked into small pieces. Ours was frozen this time so we started the heat very low, breaking up the pieces as it thawed. Add a little water and the lid so the fat begins to simmer over low heat. You want the fat to melt out of any proteins that might hold it in place without burning those same proteins. Stir frequently to prevent sticking on the bottom.
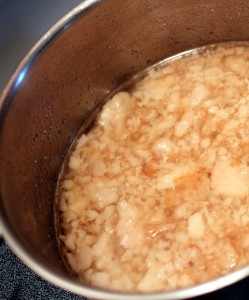
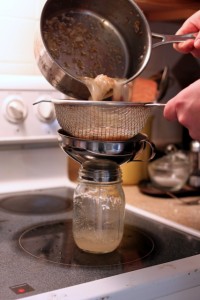
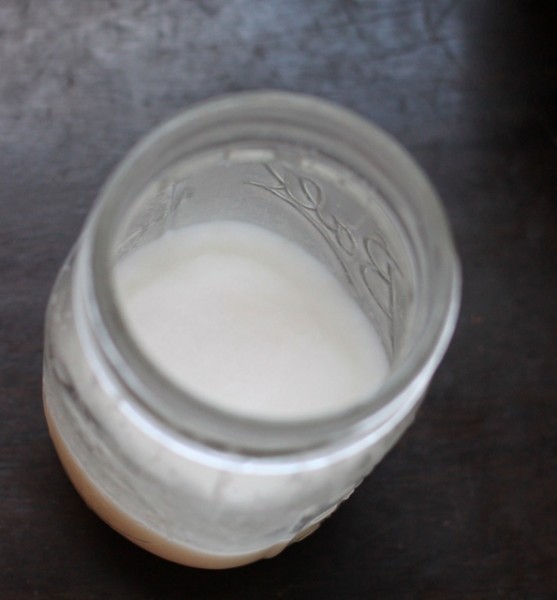
In one to three hours, you'll have a pool of fat with some pork cracklins. Drain the cracklins on a towel and eat as a snack or on salad. Pour off the liquid lard into a non-reactive container like a mason jar. Some people stir in salt at this point to flavor and preserve the fat. Allow it to come to room temperature, cover, and refrigerate for up to a month or freeze for up to a year.
What To Cook With Lard
Lard makes the best pastry. Lard pie crust (I use Ruhlman's 3-2-1 ratio of flour, fat, and water by weight with at least 30 minute rest in fridge) is flavor neutral and bakes into a flaky yet strong dough to contain fillings. Lard dough is very easy to work. Sometimes I mix lard 50/50 with butter because the butter flavor is desired.
You can pan-fry meat or vegetables in lard. It is a useful emulsifier in pates. Many traditional recipes like Mexican tamales and refried beans call for lard. Some chefs are even advancing the fat to be used as a spread like butter - whipped salted lard was part of a bread and spreads platter I ordered in October at Cleveland's The Greenhouse Tavern.
Pork Lard 1. Start with leaf fat, back fat, or belly fat from pork. Cut into one inch pieces and place in a clean deep sided pot. 2. Add a little water to the pot, cover, and begin to heat over low heat. Stir frequently to prevent sticking. Continue until all fat is melted, one to three hours. Add more water as needed to keep fat from browning. 3. Cook as long as desired to crisp up cracklings (delicious on salad or as a garnish!) and then strain through cheese cloth or a paper coffee filter. 4. Pour lard into clean glass containers and allow to cool to room temperature. You may add salt to taste while it is still liquefied Refrigerate and use within a month or freeze for up to a year.
Do you use lard? Do you make it?
PS. Like Harmonious Homestead of Facebook to see photo outtakes featuring a certain lard lovin' kitty, Moonshine.


