Homegrown Home-canned Salsa {Recipe}

homegrown salsa recipe Home-canned salsa. It sounds so simple and yet many people struggle to make something that's "just right". The first recipe I tried was too watery. The next was too bland and the third had a too-cooked texture.  These were all a disappointing use of homegrown tomatoes and peppers!

Then finally last year my friend Jenn (who also shared celery powder with me) passed along this recipe. It is thick, richly-flavored, and has a pleasing chunky texture.

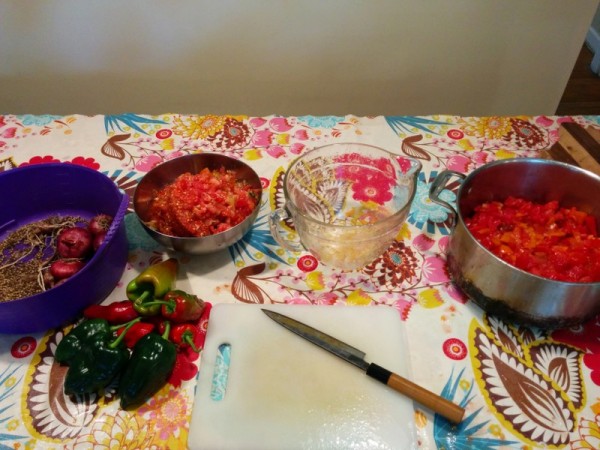
homemade salsa mise en place

There are several tricks that make this recipe work. First is the preparation of the produce. I carefully remove the seeds and watery pulp with my thumb from each section of tomato and drop that into a bowl for the chickens. I chop the remaining flesh with skin on into a colander to drain away any further juice. I measure the tomato pieces into a large measuring bowl and then move on to chopping the peppers, garlic, and onion.
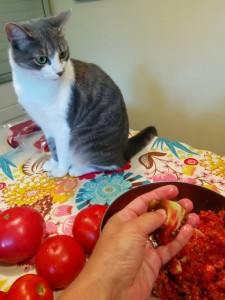
seeding tomatoes for salsacooking homemade salsa

Next up is seasonings. Dry spices like cumin and coriander add an aged, smokey flavor that differentiates this salsa from fresh pico de gallo. Our own touch is some of last season's homegrown and house smoked ancho peppers.

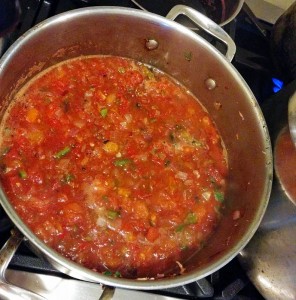
Two elements contribute to the perfect salsa texture: a quick cooking and processing time and the addition of tomato paste. Overcooked salsa has the taste and texture of tomato soup, which isn't what we prefer. Tomato paste (we can our own each year) thickens the salsa while adding a rich, dense tomato flavor.

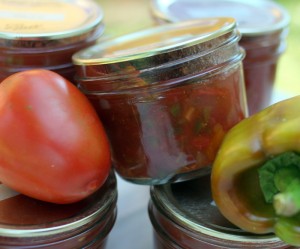
I like to can salsa in squat half pint jars manufactured by Kerr, found locally at City Folk's Farm Shop. The short and wide dimensions allow for dipping right out of the jar.

If you, like me, have been searching for the perfect tomato salsa recipe, try this one. 

Home-Canned Salsa

Makes: 10 half pints

canned salsa

8 cups chopped, seeded, drained tomatoes 2 cups finely diced red onion 1.5 cups chopped peppers (use a mix of sweet and hot peppers for a medium heat salsa) 6 cloves garlic, minced 1/3 cup lime juice 1/3 cup vinegar 1 tablespoon kosher salt 2 teaspoons ground cumin 2 teaspoons ground smoked ancho peppers 1 teaspoon ground coriander seeds 1 teaspoon black pepper 8 ounces tomato paste

1. Stir tomatoes, onion, peppers, and garlic in a large heavy-bottomed pot. Add in lime juice, vinegar, kosher salt, cumin, ancho peppers, coriander, and black pepper.

2. Bring to a simmer on the stove. Cook for 5-10 minutes until onions begin to soften. Meanwhile, heat 9 half pint jars in a boiling water bath. Wash rings and new lids in hot soapy water.

3. Stir in tomato paste and return salsa to a simmer. Taste and adjust seasonings if necessary.

4. Ladle salsa into sterilized jars. Fill to a head space of 1/2 inch. Center lid and tighten rings.

5. Process for 15 minutes in a boiling water bath. Remove from hot water, allow to cool completely, label, and store.

A note about canning salsa safely: Keep the proportions of tomatoes, onions and peppers to lime juice and vinegar consistent. This recipe keeps the ratios of pH tested recipes which rely on juice and vinegar to add acidity and balance the lower pH of onions and peppers. You can use fewer peppers and onions or spice up the salsa with additional dried peppers but do not increase the amount of peppers and onions or you might create a finished product without a low enough pH to be safely canned in a water bath.
Starting Saved Seeds

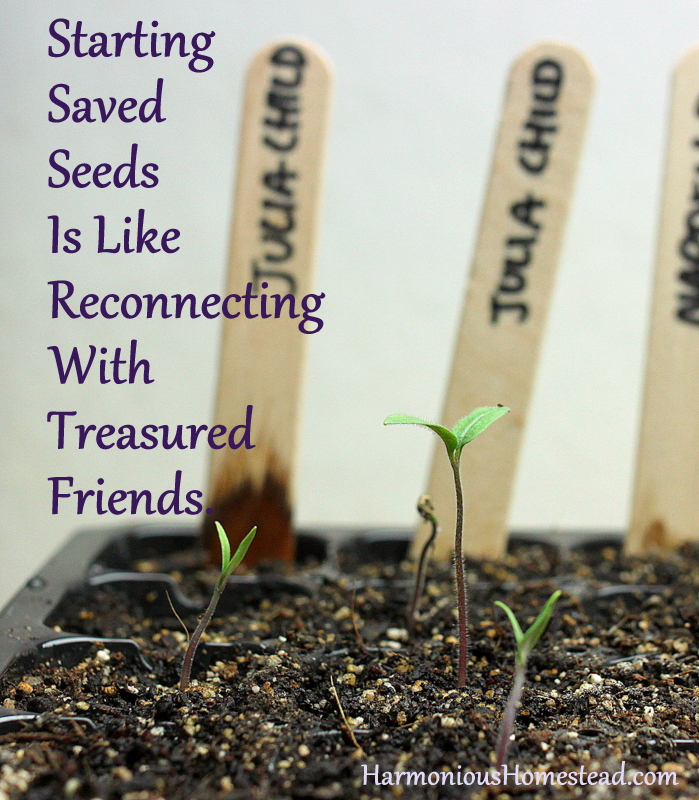
starting saved seeds Julia Child has been hanging out in an envelope in my seed box since August 2010. I saved her seeds from a sexy homegrown tomato and they laid in wait through a couple disappointing gardening seasons until now. I planted sixteen taupe seeds still stuck to their drying paper towel in two rows. After five days under lights and warmed by an electric mat, my old friend is back! I can't wait to see her luscious pink fruits this summer.

Seed saving is a commitment not of money but time and care. Seeds must be isolated from the best ripe fruit, dried, labeled and stored. In an age where companies create disposable versions of everything, making time to save seeds is practically defiant.

Starting saved seeds is also a political act. Seed savers declare "I don't believe you can patent a living thing". We perpetuate characteristics adapted to the microclimate of our individual location, something no mega-seed company can reproduce. We sustain diverse varieties of vegetables and flowers that otherwise might be lost to the perceived convenience of standardization.

I pledge to grow more saved seeds and save more than ever before this year. Will you join me? I'll share tips for success and overcoming challenges along the way.

Ketchup, For The Good Times {Recipe}

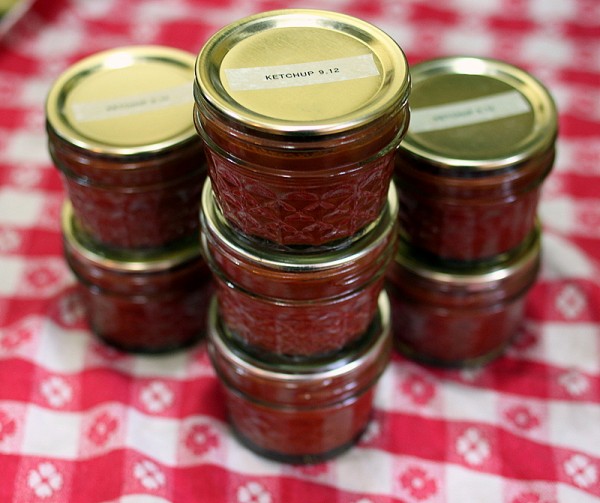
homemade ketchup recipe Some preserves are easy, some are drastically cheaper than store-bought, and some are tastier than anything you can buy. Alas, homemade ketchup is none of these things.

So I can't exactly explain why I make it every year.

I suppose I can ketchup because processing all the jars of regular sauce becomes boring. And when I'm in the midst of tomato madness, condensing a little puree with spices isn't any extra trouble - it is, in fact, a welcome chance to do something different.

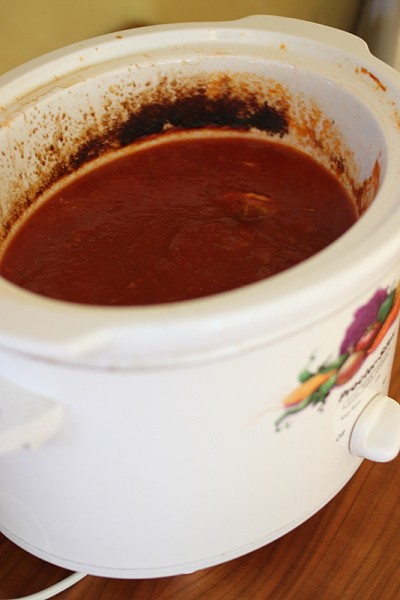
Last year I improved my ketchup method by cooking the sauce down in a slow cooker. This prevents the bottom from scorching and makes it easy to leave the house or do other chores during the lengthy, oh so lengthy, cooking period.

While ketchup doesn't meet any of my traditional characteristics of a recommended preserve, HITK readers have ask for my recipe. Here it is:

ketchup recipe in slow cooker

Homemade Ketchup

Makes: approximately 5 pints Time: 12 hours cooking, 30 minutes active

1 teaspoon olive oil 1 whole onion, diced 2 quarts tomato pulp (most easily made with a food strainer and sauce maker tool, or made by stewing tomatoes and running through a manual foodmill to remove skins and seeds.) 1 cup brown sugar or honey 1/4 cup apple cider vinegar 1 teaspoon garlic powder sachet of whole aromatic spices (your choice of bay leaf, cinnamon stick, cloves, allspice berries, juniper berries, celery seeds - I use a little of each) 1 teaspoon salt 1/2 teaspoon white pepper 1/2 teaspoon lemon juice per pint

1. Heat a medium sized pot over low heat. Add olive oil and onions. Cook until translucent, approximately 10 minutes. 2. Add onions and remaining ingredients except for lemon juice to a slow cooker*. Turn slow cooker on high and allow to simmer for 3-4 hours. 3. Remove spice sachet and set aside. Puree mixture with an immersion blender. 4. Replace spice sachet and continue to cook for 3-4 hours. Taste (don't burn your tongue!) and adjust salt, pepper, vinegar, or sugar as you see fit. 5. Continue cooking and tasting until tomato is of ketchup consistency. This may take an additional 3-4 hours. 6. Ladle hot ketchup into sterile jars with one half teaspoon lemon juice per pint. Wipe rims, place on two part lids, and process in a water bath for 35 minutes/pints, 40 minutes/quarts. Remove from water bath, cool, and store properly.

*Don't have a slow cooker? Use a medium pot on low heat, uncovered, and stir frequently to be sure the bottom does not burn.

This post, with much respect for the A Prairie Home Companion, brought to you by the Ketchup Advisory Board.

A Most Disappointing Gardening Season

dry garden august 2012This is my garden. My dry, stunted, disappointing garden.

The year started with a heat wave in mid-spring that dried out the peas just as they started to produce pods. The same temperatures caused lettuce to bolt before the leaves were big enough to eat. A few windy storms knocked off many fruit tree blooms.

Just when I had reset the backyard raised beds with Swainway seedlings, the front yard fell prey to a public works project. Workers first destroyed a peach tree and dug up an eight foot section of the tree yard to run a gas supply line along our street. A month later, a four foot swatch also lost its grass to run the residential line to a neighbor's house. Part of our alley raspberry patch was ripped apart for reasons I cannot deduce. The gas company was entirely within their rights to do such work and made attempts to replace what was removed but it hurt to watch parts of our yard torn to pieces.

Then the heat came. Days and days of hundred degree highs and very little rain led to the hottest July on record and a well publicized drought. The temperatures damaged plant growth and made us all seek shelter in the air conditioning rather than tend the garden.

So now it is mid-August when I'm used to being inundated with sexy tomatoes and bountiful peppers. Instead, my plants are shrivelled beyond repair. Where usually there are weighty colorful fruit arching the stems, the only bent branches this year are those that sustained damage in the few strong storms we received.

The blame for the garden failure can not entirely be placed on the weather; between cleaning and vacating for house showings and fatigue from chronic sinus pain I simply haven't made the time to stake and water plants. I did take an hour recently to pull up the worst of the tomatoes and plant fall greens to try to coax some food from the soil.

hummingbird in garden

Bright Spots

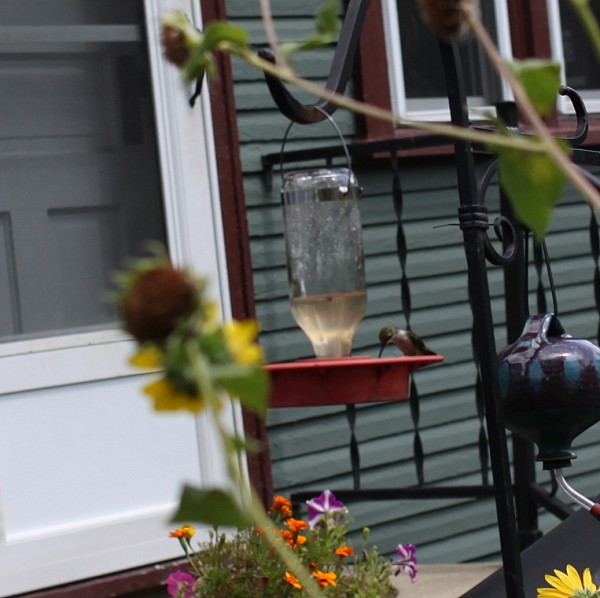
To buoy the feeling of failure, I look at the few successes of the year. Our rosemary plant and fig tree are thriving. We harvest a handful of beans a day. Smiling sunflowers that planted themselves from bird seed attract equally sunny goldfinches. And 'our' mama hummingbird visits the feeder many times a day, defending it from other females.

My thoughts are already turning to next year when my family will hopefully start a big new garden in a new house. But I cannot escape thinking about the farmers who count on growing food for their livelihood. I remain disappointed at my efforts, but pleased that I have the luxury of spending my money at farmers' markets to hopefully ease local farm losses this year.

How is your garden growing?

Summer Solstice Garden Update

After a spring devoid of garden success (sparrows ate the peas, springs crops like radishes bolted too quickly, lettuces were slow to grow), I welcome summer. Warmer temperatures and less torrential rain will surely help our sustainable garden grow.

backlit homegrown grapesviolet tomato growingnardello peppers growing
Grapes, tomatoes, and peppers bend with fruit and hope for autumn harvest.

swiss chard and greens in early summerherbs in a sideyard
Greens and herbs grow by inches overnight.

bee pollinating tomato flowerInsects exchange flower dust for nectar in the symbiotic relationship that creates so much of our food: pollination. Thank you, bees and butterflies, for this gift.

green beans climbing a homemade trellisdragon tongue bush bean flower
Beans climb and slowly reveal their flowers.

cucumber flowerwinter squash flower
Cucumber and squash plants also hide petals under their shady leaves.

chicken eyeing raspberry
We pick small handfuls of warm, soft ripe raspberries daily, coveted by child, chickens, and hounds alike.

How does your garden grow?

Meal Plan February 21, 2011

The formidable Joan Dye Gussow finished the Ohio Ecological Food and Farm Association (OEFFA) conference with a speech that included a personal history of the food movement and rabble rousing call to action. "We are well overdue in this country for a revolution!" she incited. I happen to agree though I am not the revolutionary type. I prefer to work at the ground level, tending my small plot of land, eating food from reliable sources, and making sustainability a priority in my life. Hopefully I can inspire others to make similar small changes that can rock the world though my workshops and writing.

Other words in Gussow's speech, about eating seasonally and what that looks like, spurned me to make changes this weekly Meal Plan. From now on, I will share with you some of the inspiration and ingredients that drive the meal plan.

It isn't just about putting food on the table, after all. Meal planning for local sustainable eating calls for using seasonal ingredients, eating from pantry stores, exciting the palate with new recipes and paying attention to the weather. I will try to share bits and pieces of those thins that influence our meals.

fresh tomatos on window sill

Inspiration and Ingredients:

  • President's Day Monday
  • Overabundance of pantry tomato sauces
  • Fresh sausage made at OEFFA workshop in the fridge
  • Snowville whipping cream in the house
  • Several aging oranges in the fruit bowl (We buy Florida citrus this time of year, as local as one can get for citrus)
  • Moderately cold weather with snow possible Tuesday, rain possible Thursday
  • One conference presentation, one cooking class, and one Broadway show at week's end

Meal Plan:

Monday - I'll make hoecakes for breakfast, the preferred meal of George Washington and other early presidents. Thomas Jefferson is reported to be one of the first to grow an embrace the growing of the tomato, a fruit many other gardeners considered toxic. In his honor on President's day, we will have tomato bisque and muffins or biscuits.

Tuesday - Toad in the hole using homemade sausage, cranberry orange sauce

Wednesday - Lentil chili and cornbread for family with a side of chorizo for the charcuterie fans

Thursday - Roast chicken and root vegetables for friends

Friday - Chicken and bean burritos with rice

Saturday - Speaking at Beyond Social 101, spaghetti and tomato sauce before Madagascar Live! (Only 12 hours left to enter my contest for four tickets!)

Sunday - Teaching Family Style Soups at Franklin Park Conservatory, Alex will make something for family dinner hosted here

PS. If you missed my interview with Joan Dye Gussow, you might want to click the link. She reveals a trick to longevity and fascinating information about growing sweet potatoes.

How to Make "Sun" Dried Tomatoes

A carefully dried tomato can carry the taste of summer's sweet abundance through many seasons.  Dried tomatoes provide a distinct chewy texture and richness to pan sauces and stews.  They can be eaten as is for a quick burst of vitamin C.  Making your own during is not hard at all. Equipment

Dried tomatoes are generally made in one of three ways:

  • in a solar cooker or sun dehydrator
  • in a very low temperature oven
  • in a dehydrator

A solar cooker is great because it saves energy.  You can find simple plans to build them at Mother Earth News and elsewhere.  The downside is that they take more monitoring, including bringing in at night if the temperatures drop and cause dew.

Sliced tomatoes can be dried in a single layer on a cookie sheet in a very low temperature oven (125 deg F maximum).  This temperature is best achieved by leaving the door shut with a gas pilot oven lit.  Unfortunately many modern ovens do not keep the pilot light lit and do not allow such a low temperature setting.

A home dehydrator is the more reliable method for creating great dried tomatoes.  We use an American Harvest model scavenged from my parent's basement.  We set it at 125 deg F and leave for approximately 24 hours.

Method

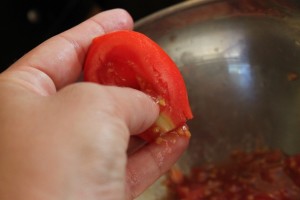
removing seeds from tomato for dehydrating

Slice your tomatoes in half or in 1/2 inch to 1 inch slices, depending on your preference and equipment.

Remove the core and at least some of the liquidy pulp.  I don't mind the taste of a few dried seeds so it doesn't bother me to leave some in.

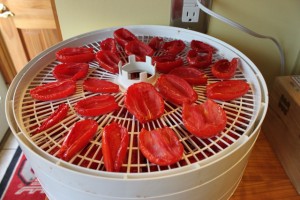
paste tomatos in dehydrator

Place tomatoes in a single layer in your desired drying apparatus.  It is not necessary to leave much space in between tomatoes because they will shrink significantly.

Start drying.  Monitor regularly, especially with a solar dryer or oven.

dehydrating tomatoes after 5 hours

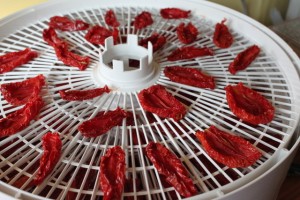
Test for doneness by breaking a tomato in half.  You should see no beads of liquid.

dried tomatoes after 18 hours

When tomatoes are done, remove them from the drying apparatus and allow to cool to room temperature.

Package in an airtight container.  You can store at room temperature, in the fridge, or freezer.  Because they take up so little room, I place mine in small plastic bags in the freezer until ready to use.

To cook with dried tomatoes, rehydrate them for 15 - 45 minutes in water, red wine, or broth.  Chop if you wish and toss in a sauce.  If using for a stew, cut dry tomatoes with scissors and then add to your recipe.

Keys to Great Dried Tomatoes

  • Use a fully ripe paste tomato.  The variety pictured in this post is Amish Paste, one I grow at home.
  • Be sure they are fully dry before storage.  Nothing breaks a cook's heart like finding a moldy batch of preserved food!
  • Prepare for shrinkage.  Tomatoes lose approximately 75% of their volume when they are dried.  Approximately 10 pounds of tomatoes will dry down to 4 cups of dried tomatoes.

This post added to Two for Tuesdays.